Get inspired

Eight paint resolutions for your 2024 DIY projects

Make 2024 your best DIY year yet by committing to these eight paint resolutions. They’ll help you get the very best out of your Resene paint and equipment, as well as achieve the perfect finish that looks great for longer. You’ll also save yourself money in the long run by completing essential maintenance and prolonging the life of your paintwork and products. Wall being painted in Resene Adrenalin.

I will… open my paint cans correctly

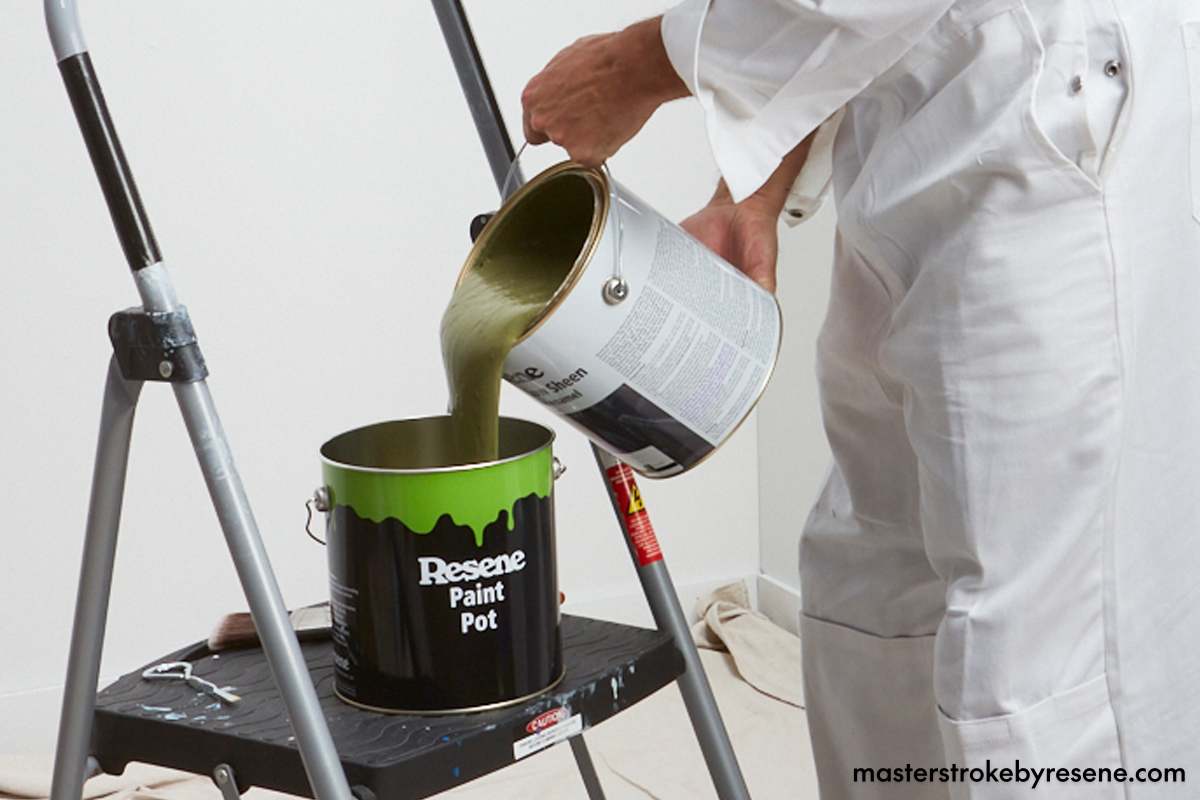
While opening and closing a paint can might seem like a basic step, doing it correctly is more important than you think. If the lid or groove is damaged or bent out of shape, this may mean the can won’t reseal properly once you’re finished painting. This will, in turn, expose the paint to air and contaminants, dry out the paint or potentially damage the formulation. An unsealed lid can also obviously cause major spills if the can is knocked over.  

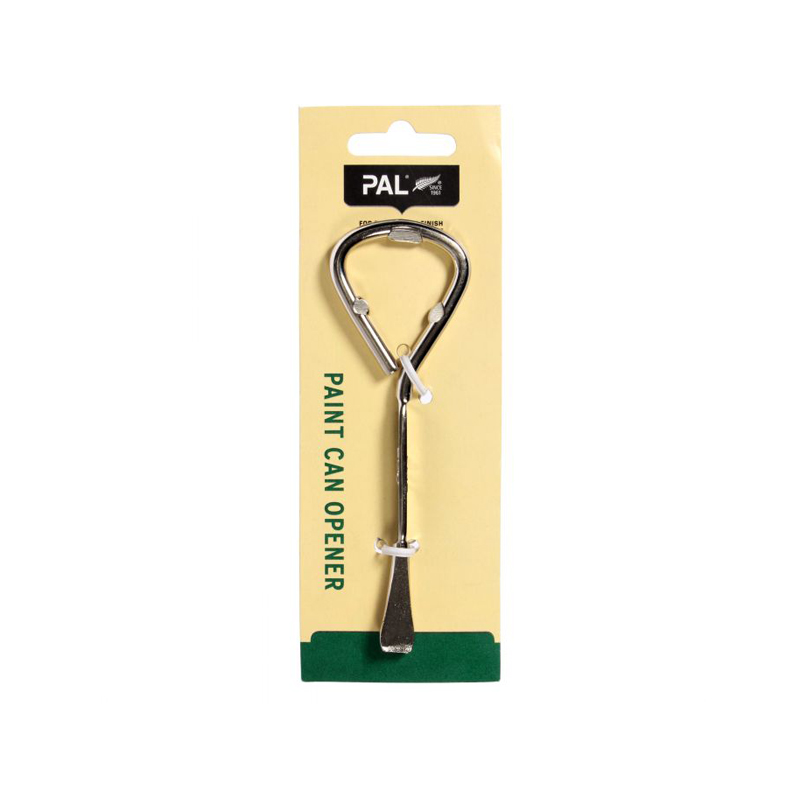
While a screwdriver may be many people’s first choice of tool to use when opening a paint can, a PAL Paint Can Opener is a far better option. The flat tip ensures no damage is done to the groove, while the looped end makes it easy to grip and work with. 

To open a paint can, gently lever the lid loose by working your way round the lip. To get it back on, make sure the lip is nice and clean by wiping it with a cloth – paint build-up can affect the quality of the seal and cause the rim to rust. Slowly put the lid back on, working your way around the sides.

I will… use a paint pot

Ever wondered why professional painters decant their Resene paint from its original can into a paint pot? This is to reduce the amount of contaminants that can get into the paint. Brushes and rollers can leave bristles, dust and spider webs in your paint, which can lead to bacterial contamination. 

While Resene paint is made with biocides to protect it against bacterial contamination, if the paint is stored for a long period, the contamination can start to take over, much like you might see with yoghurt that’s been in your fridge for too long! Paint that’s gone off smells terrible, and it’s best not to use it. If you’re not sure, bring it into your local Resene ColorShop and they’ll check it for you.

For more about paint pots, check out this article:
The importance of using a paint pot

Decanting your Resene paint into a smaller pot protects it from contamination and makes it easier to move around while painting. Paint being poured is Resene SpaceCote Low Sheen in Resene Dingley.

I will… store paint correctly

It’s super handy to have a can of leftover paint stored away in case you need to do touch ups or further renovations. Luckily, Resene paint lasts for years when cared for and stored correctly. 

Always label the can with the paint colour name, where you used it in the house and when. It’s also good to mark on the side of the can the level of the paint so you don’t have to take the lid off to check how much is left. 

While your garage or shed might seem like the obvious place to store leftover paint, small uninsulated spaces can heat up and cool down quite quickly, which can affect the longevity of the paint. Paint is best stored around 15-20°C and out of direct sunlight. Too hot and you can start to cook your paint, which will lead it to start skinning faster. It’s best not to store paints directly on a concrete floor as big temperature changes can affect the paint quite quickly, so store it on a shelf out of the reach of children if you can. A good idea is to pop it into a box first, just in case there is any wet paint on the bottom of the container.

I will… dispose of unwanted paint properly.

If you have leftover or expired paint, take in your cans and pails to a Resene PaintWise Collection Centre (NZ) or to Paintback (Australia). Resene PaintWise Collection Centres are located at selected Resene ColorShops with the aim of reducing the amount of paint sent to landfill. Resene PaintWise trucks visit collection centres to process returned paint, with good-quality unused waterborne paint being gifted to community groups, and solventborne paints being sent away for solvent recovery or for reuse by other companies. Metal tins and other packaging is recycled. 

Of course, the best way of reducing waste is by ordering the right amount for the project in the first place. Ask your Resene ColorShop to help you calculate the amount of paint you need or use our handy Paint Calculator tool below.

To find out more about disposing of old paint, check out this article:
How to get rid of old paint safely

The Resene PaintWise programme makes it easy for you to recycle unused paint.

How much paint will you need?

If you change data entered into the fields below, ensure you press the calculate button again to re-run the equations and get the new answers.
Calculated result: 0 Litres in total
To find the spreading rate of your Resene product, click here.
NB: Porous surfaces and shapes (ie corrugated iron) will require more paint.

I will… clean my paintwork

When it comes to keeping your painted surfaces clean, think of it like booking your car in for a service with your mechanic. Cleaning interior and exterior paint will not only keep it looking its best but will help it last for years to come. Best of all, this is a job you can easily do in an hour or two. 

For interiors, spray Resene Interior Paintwork Cleaner onto the painted surface and gently wipe using a wet cloth. For exteriors, dilute Resene Paint Prep and Housewash in a bucket with water following the instructions on the label. 

Alternatively you could use Resene Bio-Cleaner, an Eco Choice-approved product containing eugenol (the active ingredient in clove oil) which helps to inhibit mould and fungal regrowth. Dip a soft brush into the cleaning solution and wash the surface of your house following the grain of the timber, then rinse the surface clean using a hose. Do not use a water blaster, as this can damage the surface of the timber and allow water to become trapped in the timber fibres, damaging the paint.

For more advice on cleaning painted surfaces, check out this article:
How to clean painted surfaces inside and outside your home

Strong household cleaners can damage your paint finish, so it’s best to use Resene Interior Paintwork Cleaner instead.

I will… read the product labels

It’s crucial to thoroughly read the labels on your paint products before you begin your project. This way you can avoid any unexpected issues and save yourself time and effort. Taking this valuable time at the beginning will clear your head and help you focus on your project in the best way possible, so you can get the job done right the first time. 

As well as the obvious safety precautions, the labels give you valuable information about each product, including how to use them, the best roller and paintbrushes to use, how to clean your equipment and vital things to avoid. If you find it too tricky to read the small print or paint has dripped all over your cans, Resene conveniently has labels for all their products online, so you can read all the information on your device instead and zoom in if you want a bigger print size.

Check out what Resene Paint Expert Murdo Shaw has to say about reading product labels in this video.

I will… look after my paintbrushes

A quality paintbrush will give you excellent results, provided you take the time to clean and store your brush properly. To protect the life of your paintbrush before you start painting, wrap a piece of painter’s tape around the edge of the paintbrush, where the bristles meet the metal ferrule, so that half of the tape is on the metal and half on the paintbrush bristles. This will stop paint from drying right against the head of the paintbrush, which can cause the bristles to splay and lose their shape.

Never store a brush that has any wet paint left on it. As soon as you’ve finished your painting project, remove any excess paint that’s on your brush and soak the bristles in cold water. Next, rinse under plenty of water, making sure you clean right up inside the brush, next to the ferrule, and wipe down the handle. Once you have cleaned and rinsed your paintbrushes, dab them on newspaper, paper towels or a clean rag to absorb excess water, and leave your paintbrush to dry. 

Once the bristles are dry, wrap them in clingfilm to store between painting sessions. You can also put the brush in a plastic bag and use masking tape to secure it firmly around the base of the brush handle, or you can store it in the original cardboard holder you bought it in, which will also help to keep the bristles in shape. Read more about cleaning your paintbrushes here.

I will… use my paintbrush correctly

Using a paintbrush might look easy, but DIYers know there are a few tips and tricks that make all the difference when it comes to getting a professional finish. First of all, make sure you choose the right paintbrush for your job. Size does matter – a bigger brush holds more paint and is good for larger areas, but it can get quite tiring on your wrists if you’re using it all day. 

The most popular brush sizes are 50mm and 63mm, but it’s a good idea to pop into your local Resene ColorShop and try a few out. Ask for help if you need it, because there are some important things to consider when you’re choosing paintbrushes. Think about your strength and experience, the type of brush you need, the size of the project, the surfaces you’re painting and the type of paint you’re using.

Make sure you’re using your paintbrush correctly – hold the brush with your first two fingers and thumb, not too tight or too loose. Dip one-third to one-half the length of the bristles into your paint container, removing excess paint by tapping the brush on the side of the container. Avoid dipping the entire length of the bristles in the paint as this will push paint into the ferrule of the paintbrush, which can cause it to clog up. Plus, you’ll likely end up with paint drips making it harder to get a smooth finish.

Paint with the tip of your paintbrush, not the sides. Hold the paintbrush at about a 45-degree angle to the surface and work mostly with your wrist rather than your arms and shoulders. For the best results, try and get a good flowing motion with long brushstrokes.

The best way to hold your paintbrush is with your first two fingers and thumb and try not to grip it too tight. This wall is being painted in Resene Double Stack

About MasterStroke by Resene
MasterStroke by Resene is here to help you master your paint and decorating DIY projects. Brush up on your skills with advice, tips and ideas from our trusted experts.

Check out the latest how-to videos on our YouTube channel.