DIY projects

Use an old bucket to make a handy coat rack

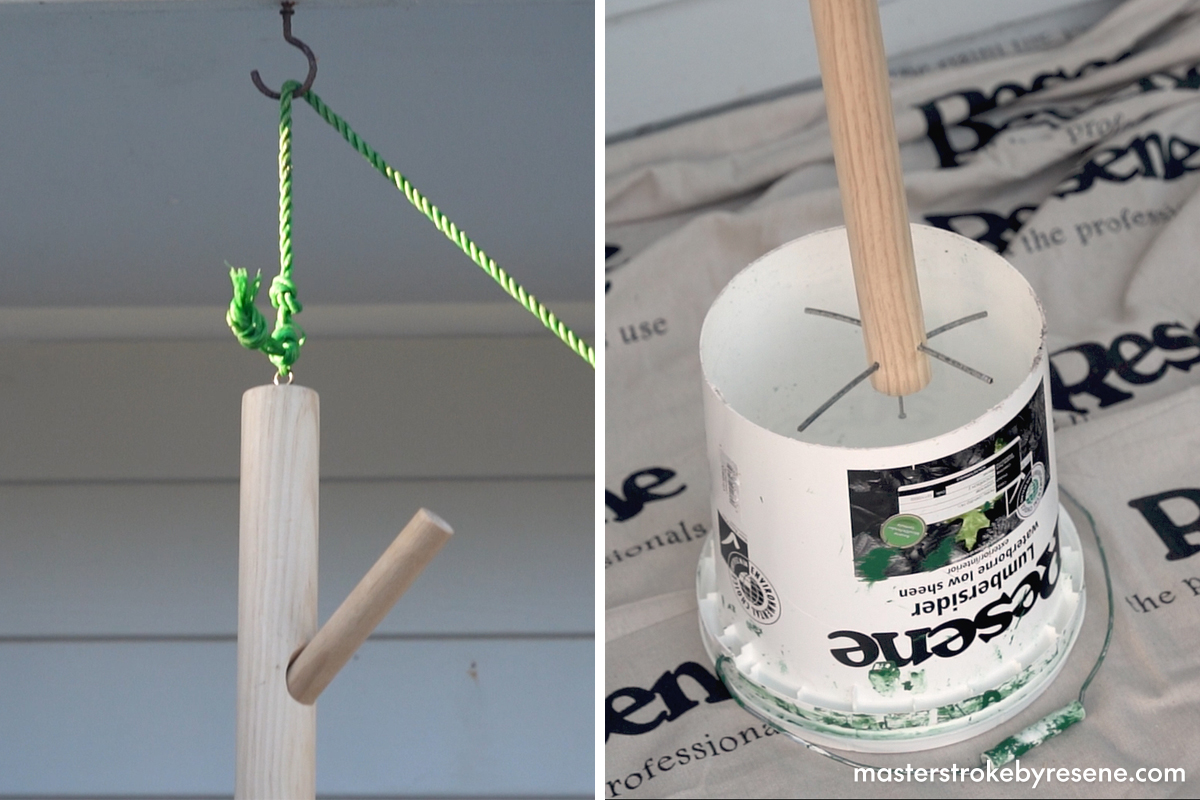
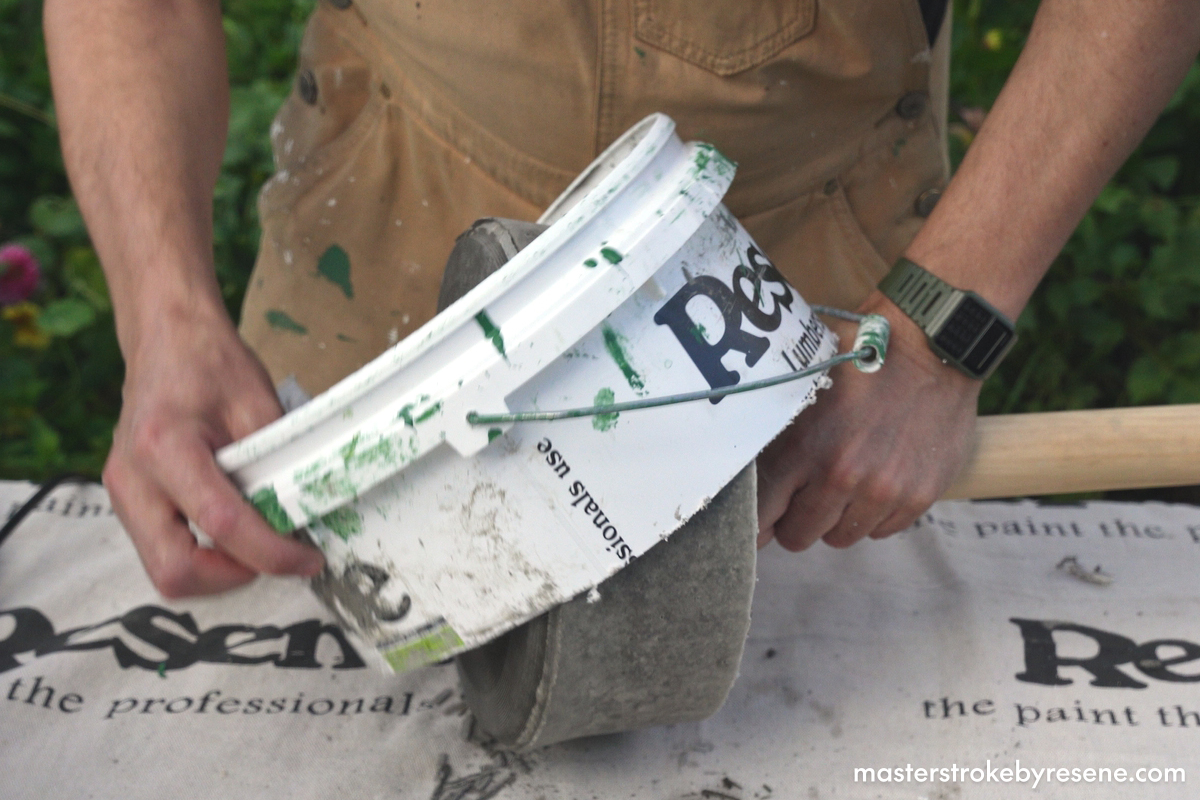
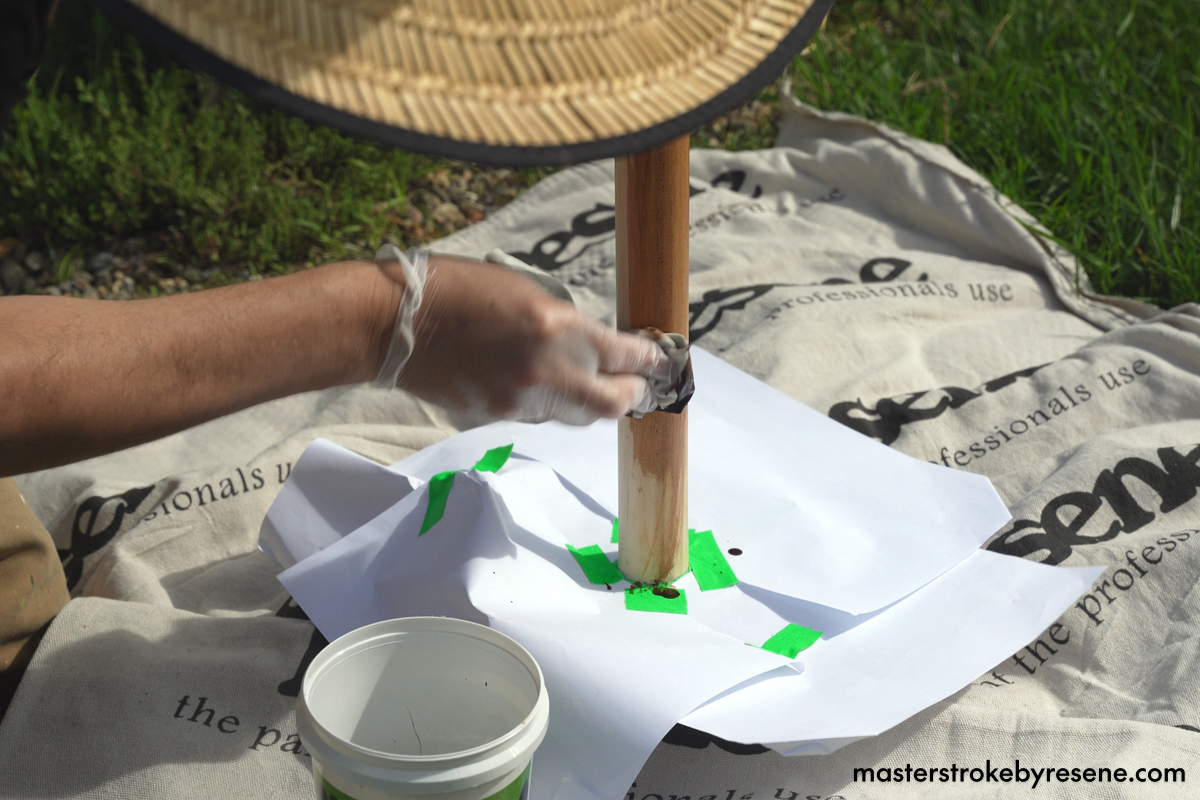
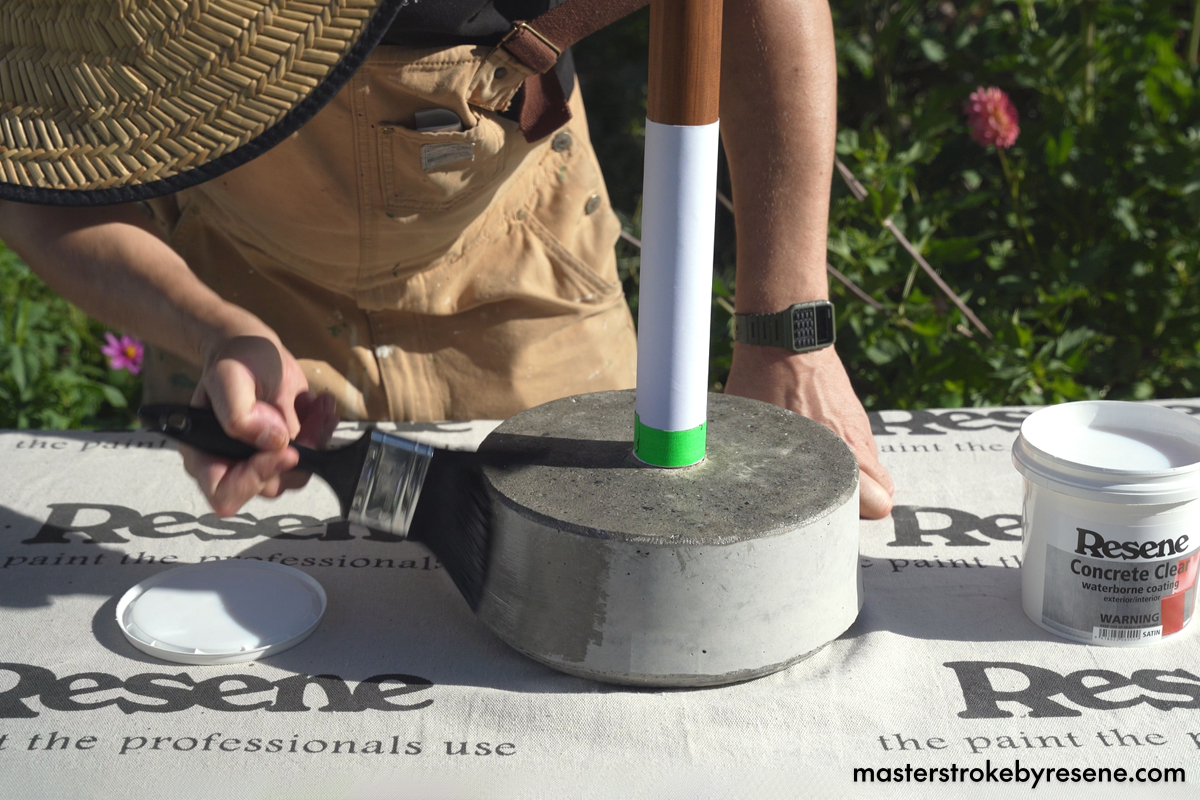
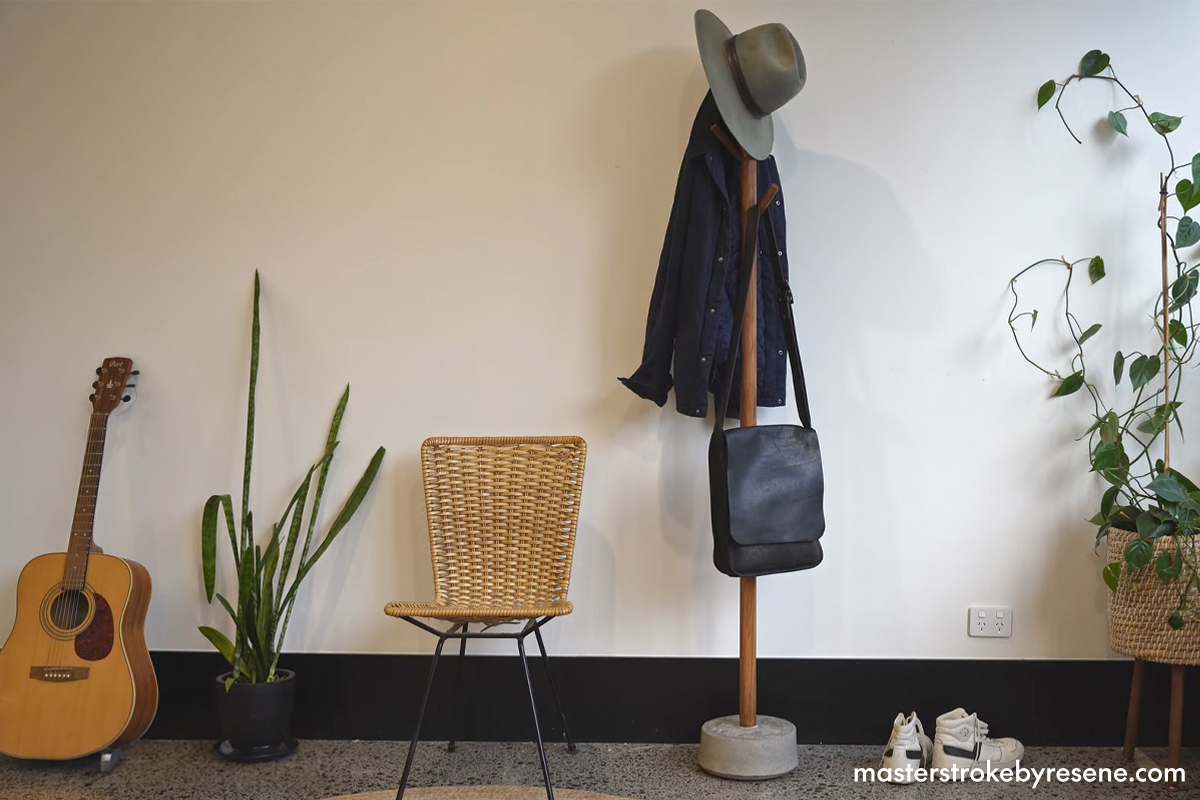
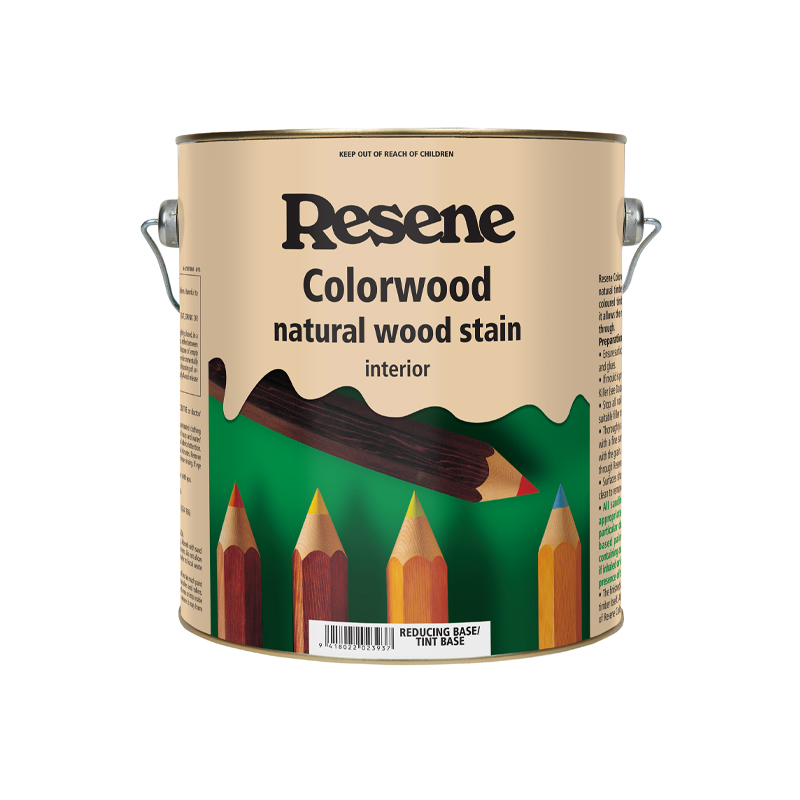
With the changing of the seasons comes the challenge of finding the right place to hang your coats and jackets so that they’re easily accessible. Luckily for us, Jacob Leaf (Ngāpuhi), better known as The Upcycler, has come up with a brilliant solution to help you both organise your wardrobe, and better yet, create a lasting piece of furniture that will match your interior by choosing a Resene Colorwood natural wood stain to work in with your existing colour scheme

With this step-by-step guide, it’s easy to create your own DIY coat rack and add a touch of style to your living space. This designated space for jackets, scarves and hats means no more damp clothes piling on the floor and unnecessary clutter in the entrance to your home. Embrace organisation and style with this upcycled coat rack.

Cost: Approximately $90 excluding Resene products.

  • Speed clamps
  • Drill
  • 5mm wood drill
  • 10mm wood drill
  • 20mm spade bit
  • 20mm Forstner bit
  • Tape measure and pencil
  • Hand saw
  • Sandpaper
  • Paintbrush or rag
  • Angle grinder with cut-off disc and grinding disc

1

Drill holes for hangers

To drill the angled holes for the hanger pegs, secure the main 40mm dowel with two quick clamps.

Measure and mark 150mm from the end. Drill a pilot hole at a 45-degree angle, then gradually increase the size of your drill bit until you have a 20mm hole – start with the 5mm drill bit followed by the 10mm drill bit followed by the 20mm spade bit, then finish the hole with the 20mm Forstner bit.

Repeat until you have a total of three 20mm holes about 150mm apart, offset by 25 degrees.

2

Attach hanger pieces

Cut three 150mm hangers from the 20mm dowel. Lightly sand the ends smooth then wipe off any dust. 

Sand around the holes of the main dowel then wipe off any sanding dust.

Apply wood glue to the holes in the main dowel, then fit the hanger pieces.

3

Prepare the bucket

To prep the bucket for the concrete mould, peel off any old paint from the inside, firmly secure the lid then cut off the base. Inverting the bucket like this will create a nice taper from small to large at the base.

Top tip: By using the Resene paint bucket as a concrete mould, you’ll have a sturdy base that can hold the weight without toppling over.


4

Extra security

Drill two crossing 5mm offset holes at the bottom of the main dowel, then insert the pieces of scrap number 8 wire. These will help secure the coat stand in the concrete base.

5

Get ready to hang

Screw a small eyelet into the top of the main dowel so it can be suspended while the concrete hardens.

Hammer a nail into the bottom of the dowel to keep it elevated above the bottom of the concrete pour.

6

Suspend and pour

Hang the main dowel so it is just resting centred in the bucket.

Mix the concrete as per instructions then pour it into the bucket. Loosely cover with a rubbish bag. This will prevent the concrete from drying too fast and cracking. Leave to set for at least three days – the longer, the better.

7

Free the base

Carefully remove the bucket and smooth any rough edges with a file or angle grinder.

8

Stain the dowel

Use Resene EzyFill Quick to tidy up any mistakes around the peg holes. Sand smooth and wipe away dust. Stain the dowel with Resene Colorwood natural wood stain, using paper to protect the concrete base. Jacob used the colour Resene Walnut. 

Apply two or three coats of Resene Aquaclear on top, allowing dry time between coats.

9

Clear coat

Seal the concrete base with Resene Concrete Clear waterborne coating for a professional look and for easier cleaning.

10

You’re done!

Your new DIY coat rack is ready to keep your gear organised and easily accessible when the weather changes.

About MasterStroke by Resene
MasterStroke by Resene is here to help you master your paint and decorating DIY projects. Brush up on your skills with advice, tips and ideas from our trusted experts.

Check out the latest how-to videos on our YouTube channel.