DIY projects

Turn an old timber ladder into a plant stand

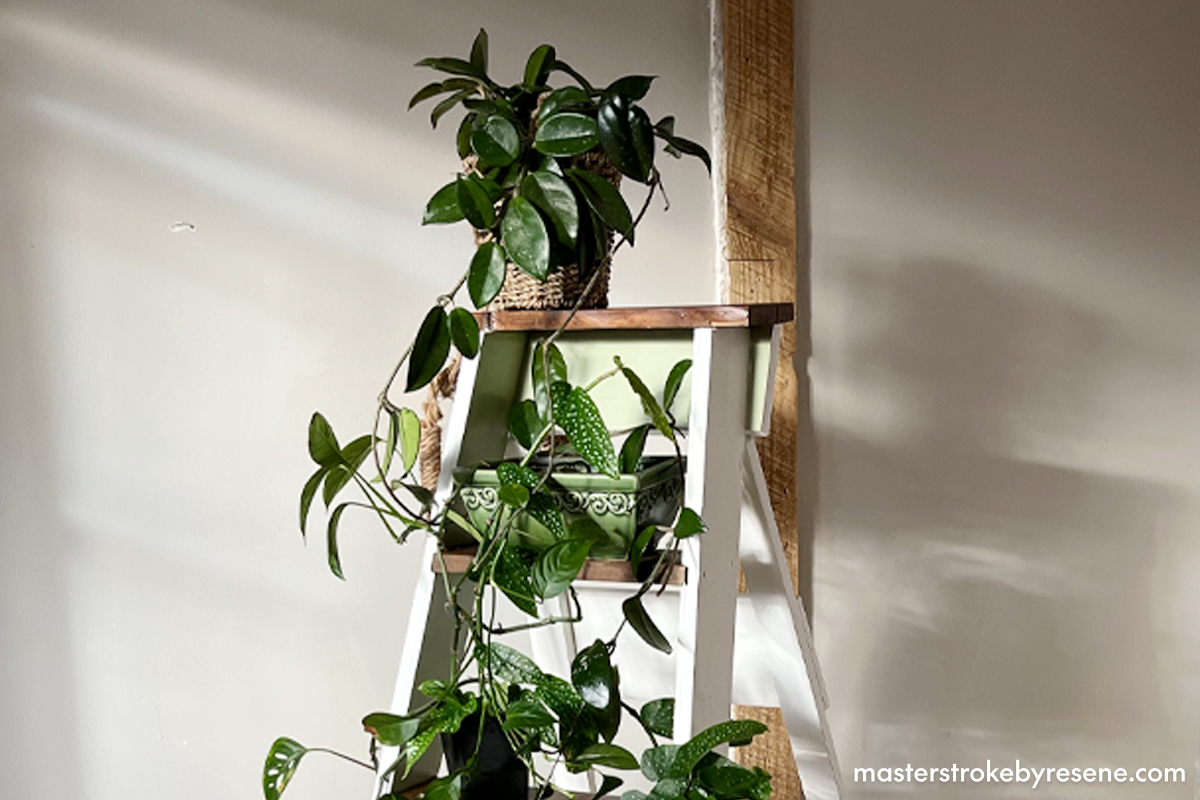
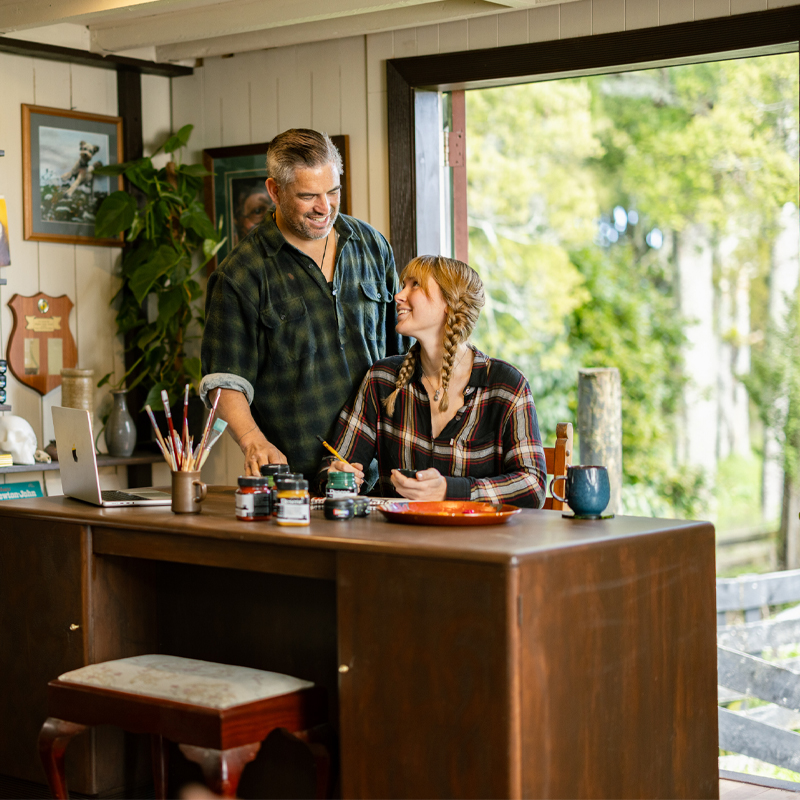
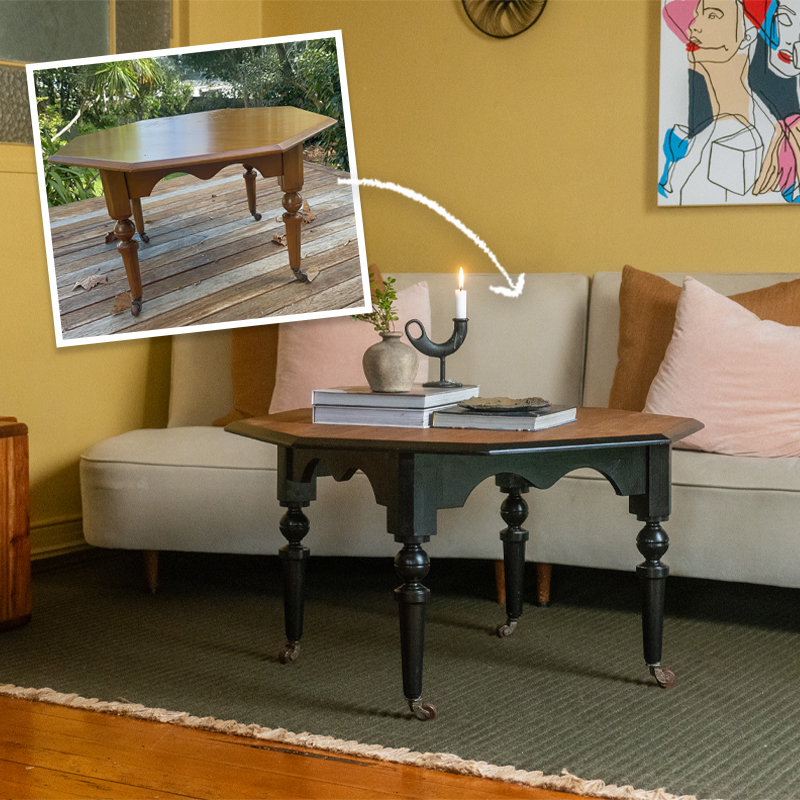
There’s nothing much more satisfying than harnessing your inner creativity and DIY prowess by breathing new life into an old piece of furniture. Keen thrift flipper Thomas Swain immediately saw the potential in this old timber painter’s ladder that his neighbour no longer needed. He was able to look past the wear and tear and old paint splatters and see that the A-frame’s sturdy wooden steps would make the perfect display shelf for his houseplants. The refreshed and reinvigorated ladder could also make a perfect place to show off photo frames and ornaments.

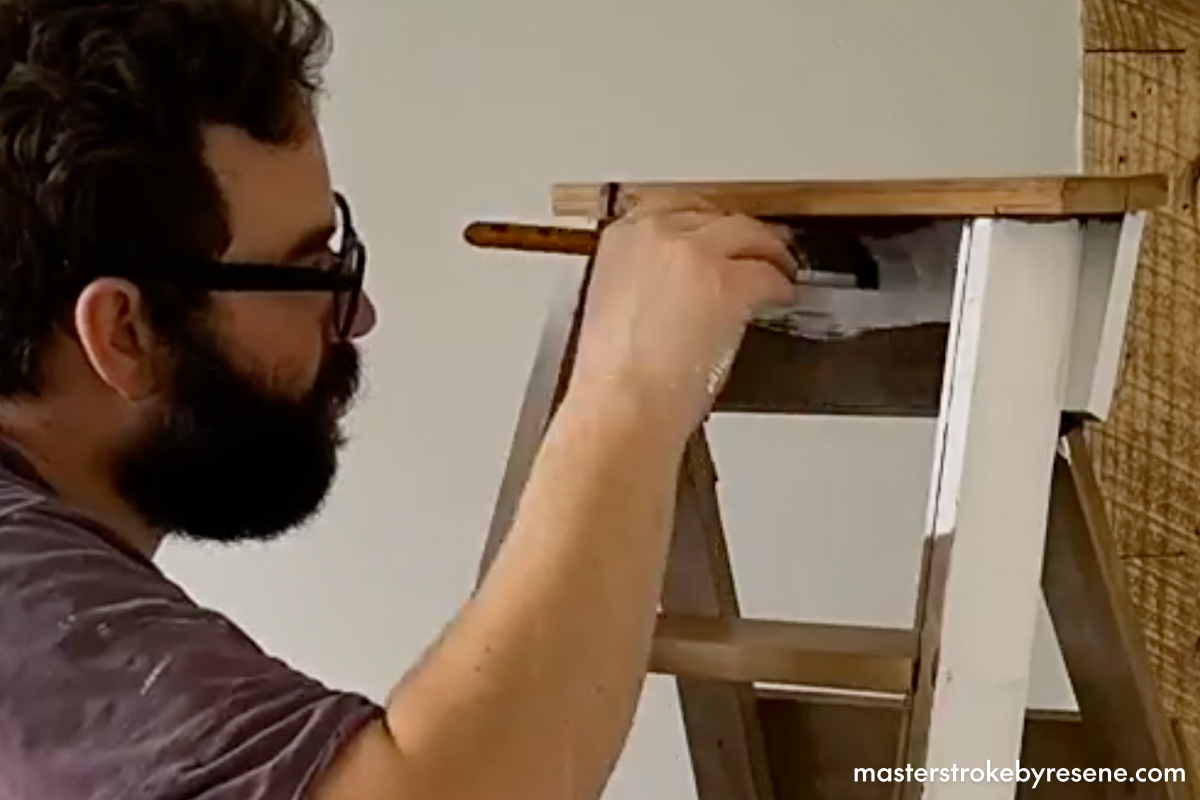
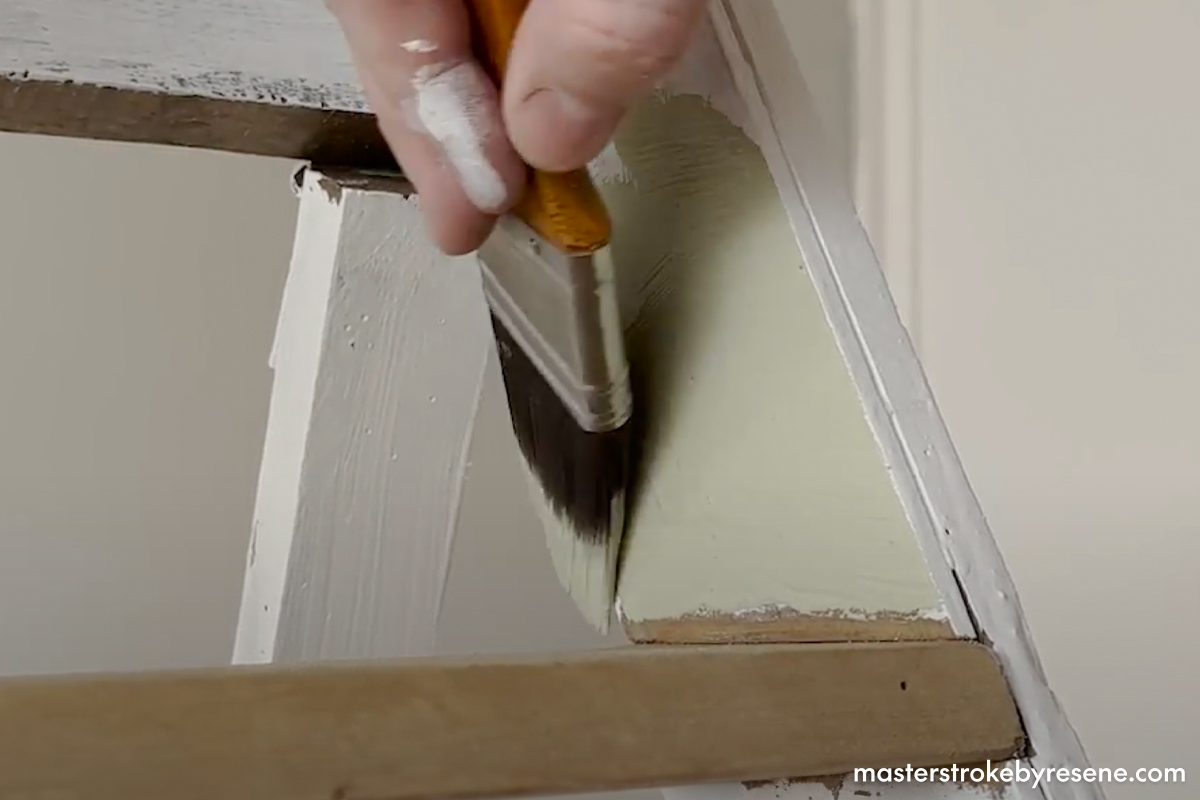
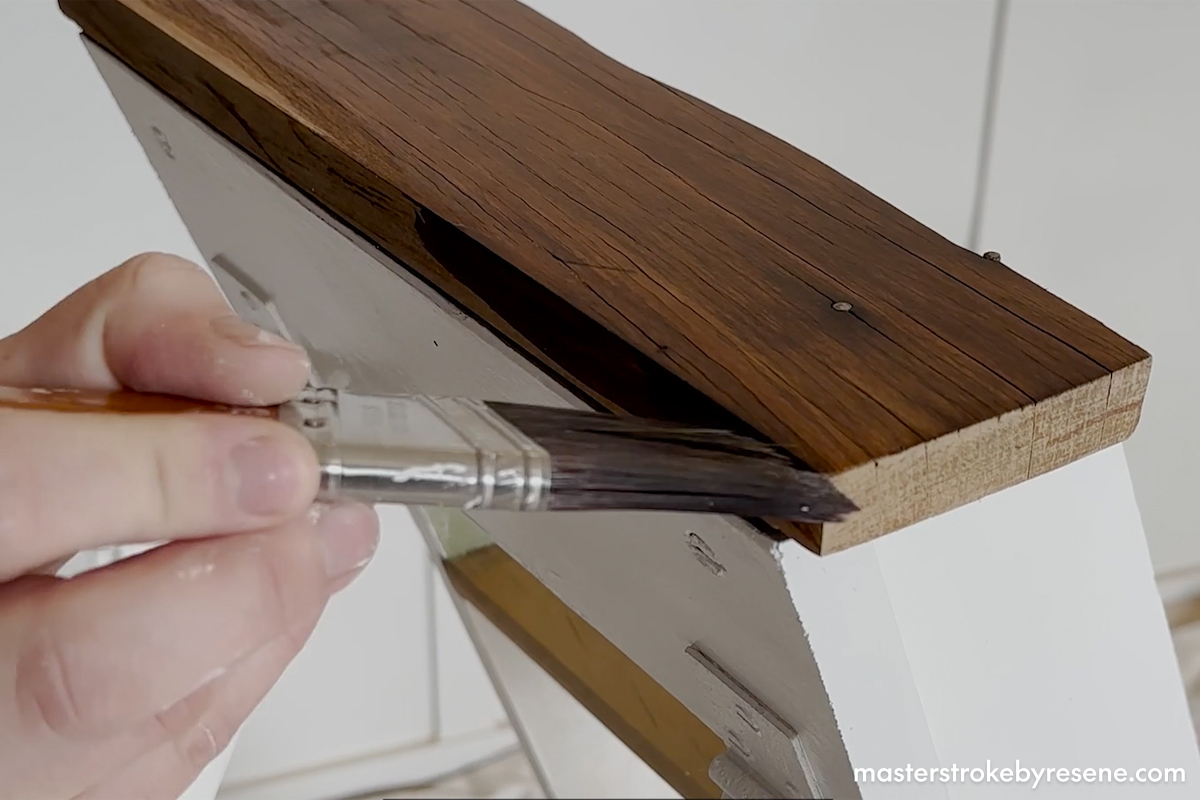
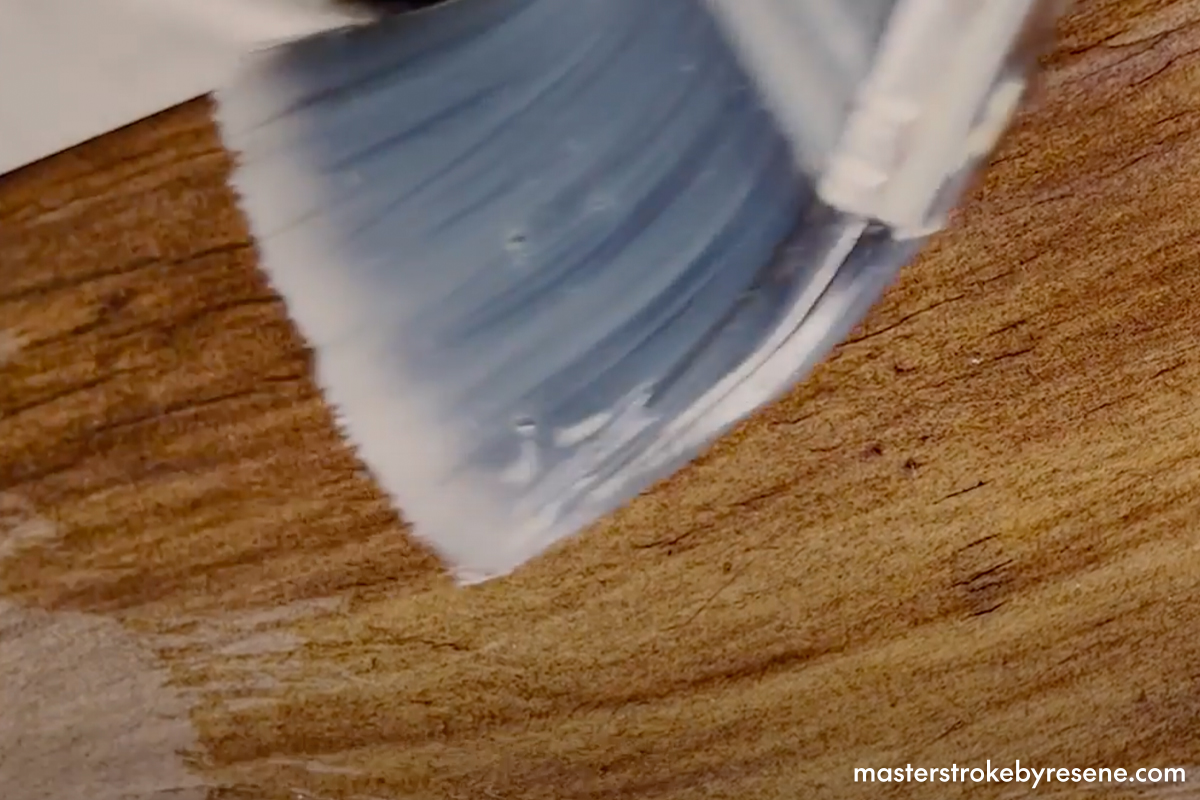
While Thomas had a fairly clear vision of the end result he wanted to achieve, he headed into his local Resene ColorShop where the team guided him through the exact products that would work best for this particular project. Together they decided on a combination of paint and stain – that way Thomas could include some stylish colour, while also allowing the natural beauty of the timber to shine through. 

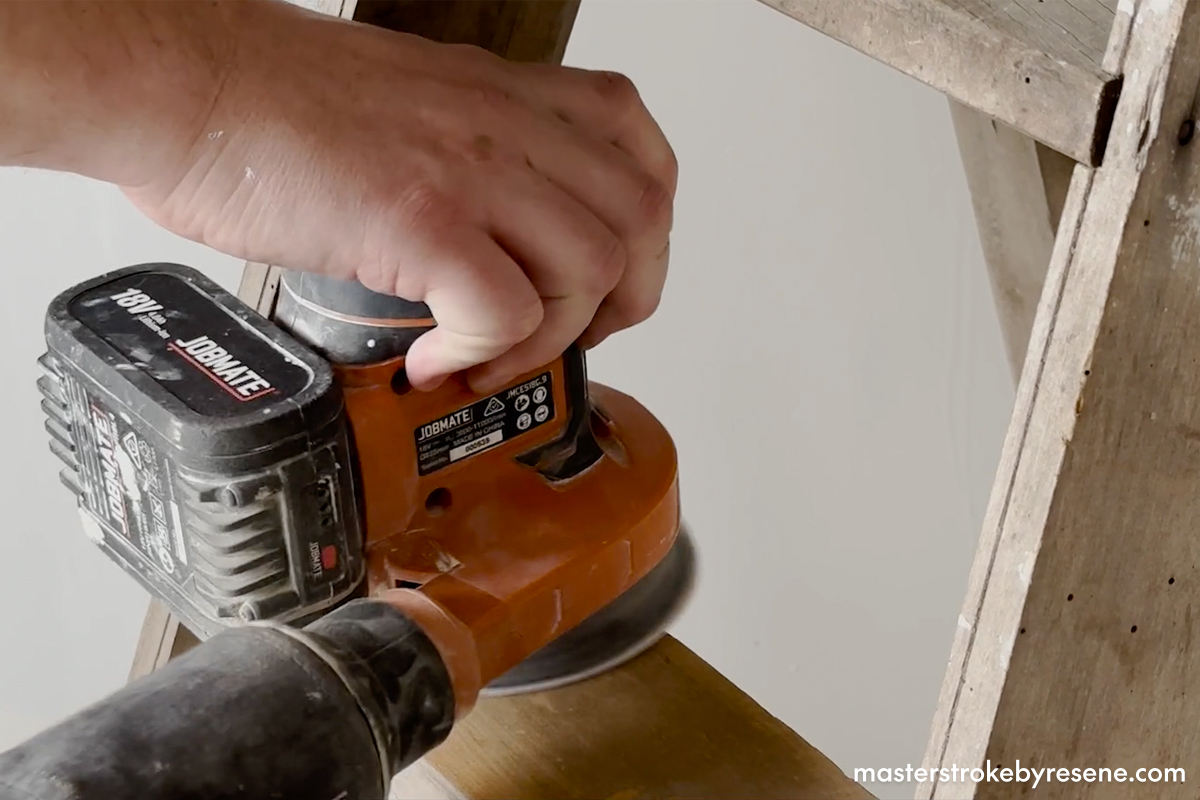
This is a relatively straightforward DIY project that you can complete over a weekend. Once you’ve gathered all your Resene products and a few tools, you’re ready to get started!

1

Prep

Before you begin, put down your drop cloth to protect your floors from dust, splatters and stains. Resene drop cloths are made of lightweight canvas, making them super easy to clean, store and reuse. 

Make sure you’re wearing the correct safety gear, then give the whole frame a light sand. This is a crucial part of the preparation that, if done correctly, will give you the most professional looking finish.

As the steps will be stained rather than painted steps, start with an 80 grit disc – this coarse grit is ideal for removing imperfections like old cracks and paint splatters, and smoothing surfaces. Then switch to a 180 grit disc, which is best for producing ultra smooth, flawless finishes on wood. Go over each step of the ladder thoroughly, not forgetting the front edges. Wipe away all the dust with a clean, damp cloth. If you don’t have an electric sander, you can sand by hand with sandpaper sheets instead.

2

Prime

Decant Resene Quick Dry waterborne primer undercoat into a separate paint pot. This makes it easier to manage and will prevent any contaminants from your brush getting into the main can, which can adversely affect the paint if you want to store it for another project later

Carefully apply one coat Resene Quick Dry to the frame, making sure to leave the steps free of primer. Leave to dry.

3

Paint

Now it’s time to apply two coats of Resene Lustacryl, which is the perfect choice for furniture. Thomas has chosen Resene Quarter Thorndon Cream for the main frame, and Resene Frontier for a subtle pop of colour on the interior frame. Allow at least two hours of drying time between coats.

Top tip: For the best results and a comfortable, controlled grip, hold your paintbrush like you would a pencil, near the base of the bristles. Dip one-third to one-half the length of the bristles into the paint, then tap (not wipe) the paintbrush against the side of the can. Paint with the tips of your paintbrush, not the sides, and hold it at about a 45-degree angle to the surface. Work mostly with your wrist rather than your arms and shoulders.

4

Stain

Apply Resene Colorwood natural wood stain to the steps of the ladder and leave to dry. Thomas chose Resene Colorwood natural wood stain in Resene Bark. The beauty of this product is that it adds colour to the timber, while allowing the natural grain to show through. 

Checking out the interior wood stain test panels at your local Resene ColorShop gives a great idea of all the different tones available.

5

Varnish

Once the stain is dry, apply two coats of Resene Aquaclear waterborne urethane varnish and allow to dry. Thomas chose a semi-gloss finish, but if you prefer a gloss finish you can use Resene Aquaclear gloss or for a lower sheen finish, use Resene Aquaclear satin.

6

Done!

You’re ready to arrange your plants, trinkets and treasures on your brand-new display shelves.

The importance of brushes

Throughout this process, Thomas has discovered the joys of investing in quality tools. “I used to just buy a multi-pack of super cheap, plastic paintbrushes,” he shares. “But after using the PAL Legend Ultra Premium Brushes, I am totally sold. The 38mm brush is my favourite and the finish is so smooth.”

PAL Legend brushes are handcrafted in New Zealand using 100% DuPont Orel Tynex filament, which delivers premium quality performance with all paints, particularly waterborne enamels like Resene Lustacryl.

For more advice on choosing the right paintbrush for your project, check out this article.

About MasterStroke by Resene
MasterStroke by Resene is here to help you master your paint and decorating DIY projects. Brush up on your skills with advice, tips and ideas from our trusted experts.

Check out the latest how-to videos on our YouTube channel.