DIY projects

Hang out in your own DIY outdoor swing chair

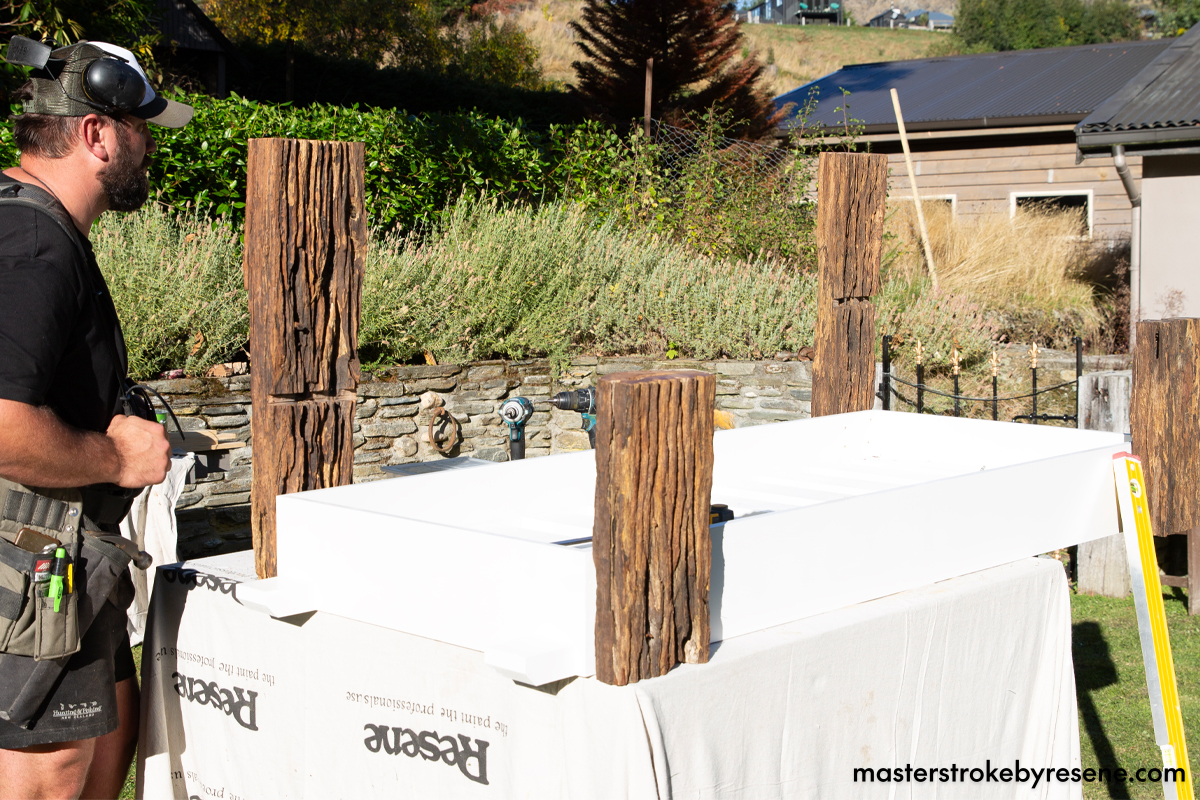
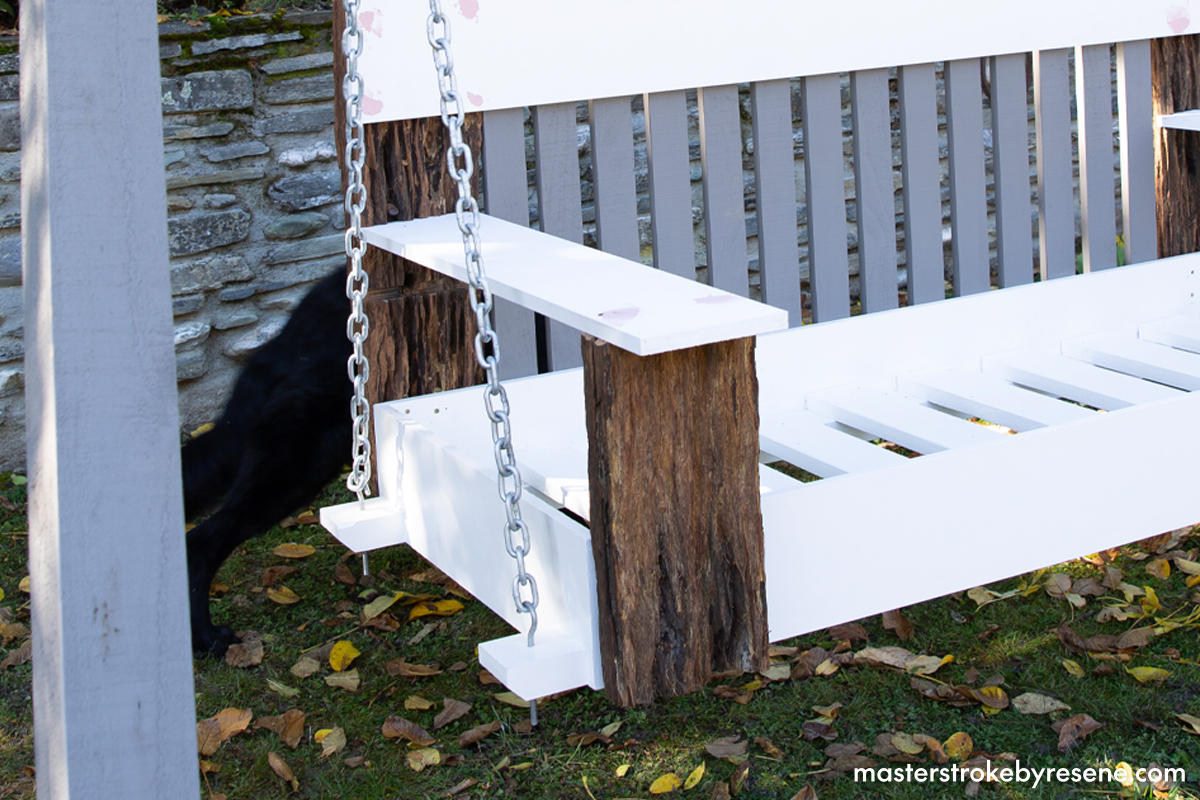
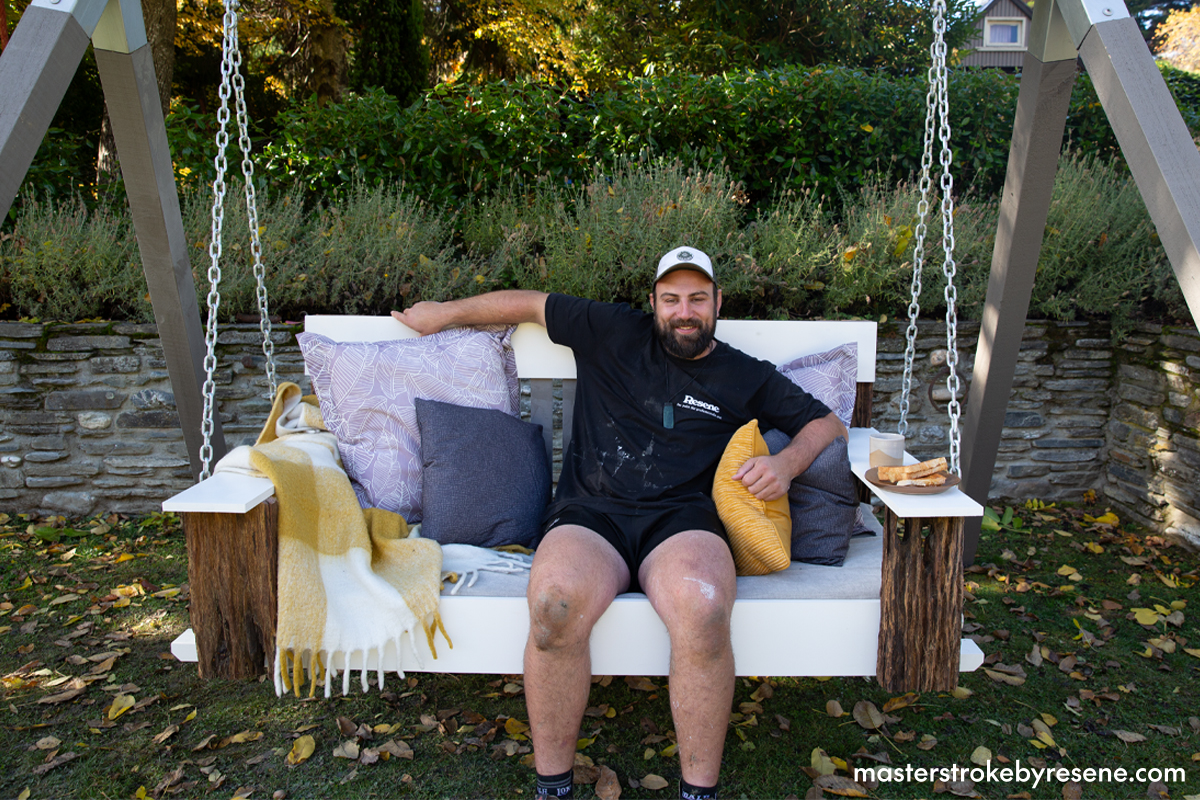
Incorporating a swing chair is an impressive way to elevate your outdoor entertainment area. It will not only enhance the overall look and feel of the garden but will also provide a comfortable spot to relax and reset outside. Incorporate railway sleepers for a charming rustic look, wide arm rests so there’s room to place a coffee, lunch or a cold beer, plus enough space for two adults to sit comfortably.

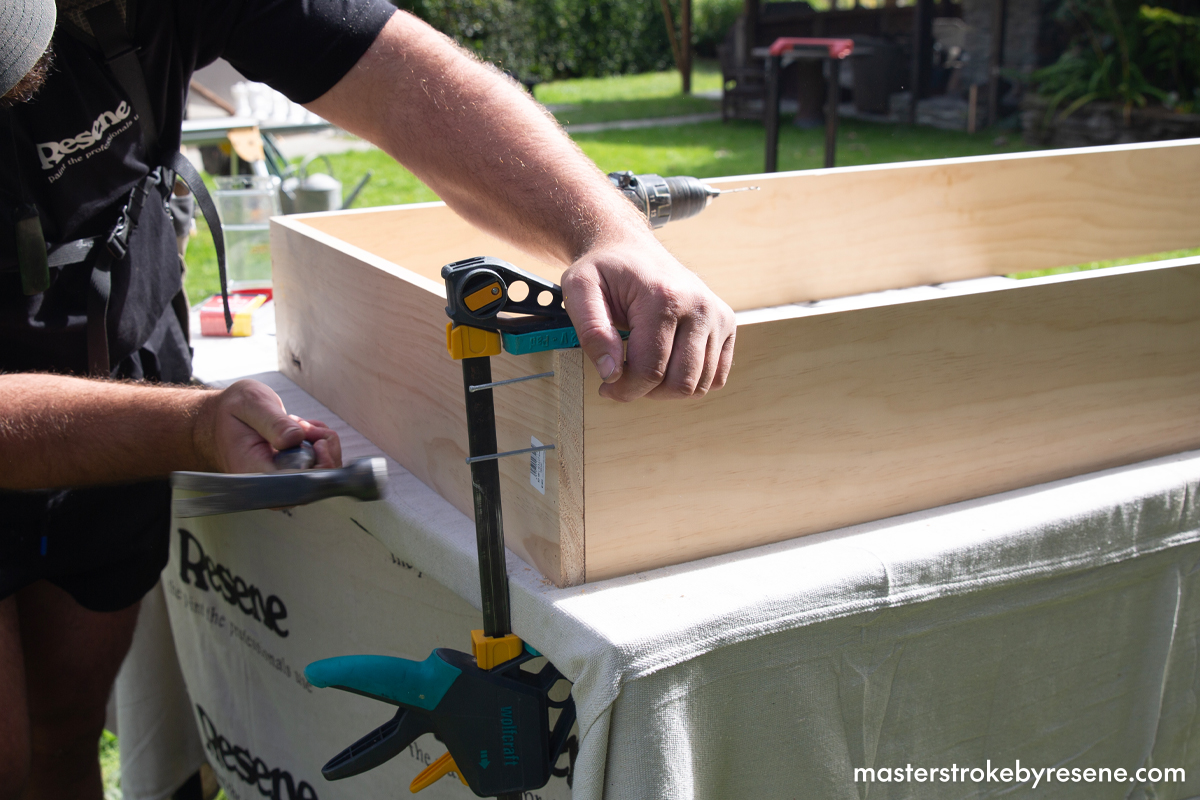
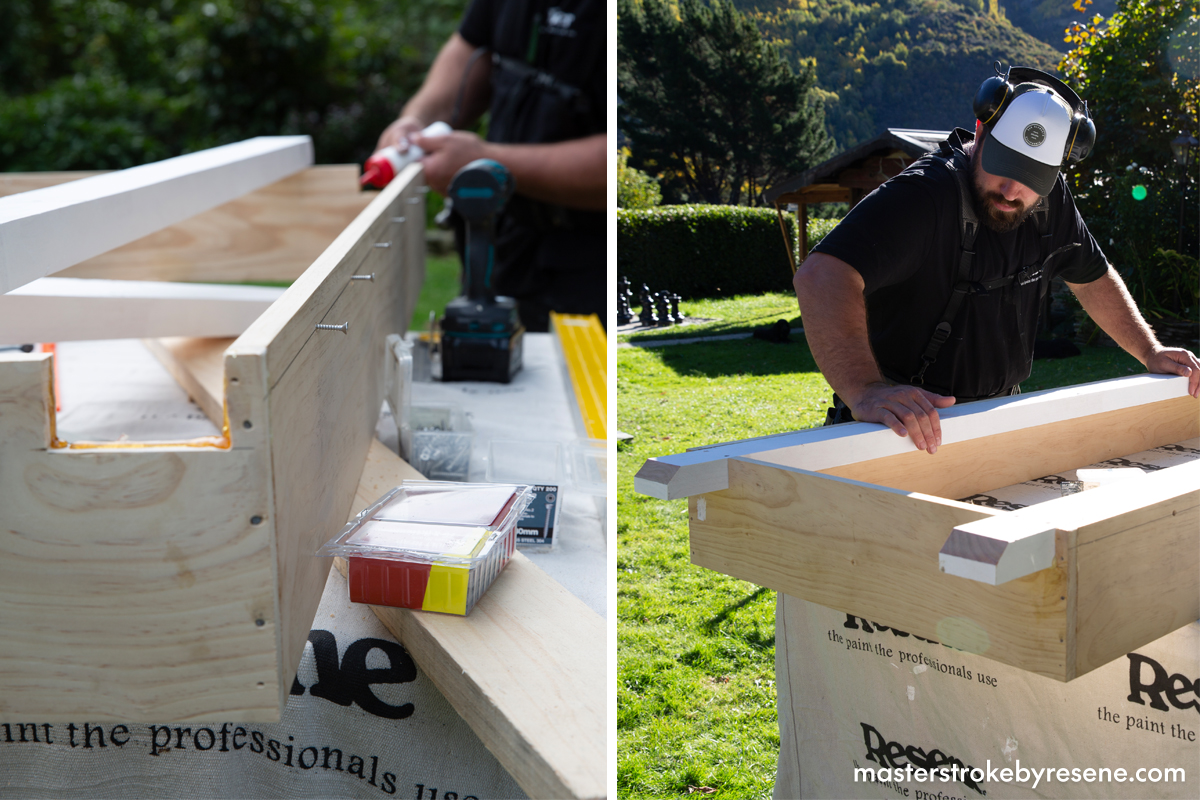
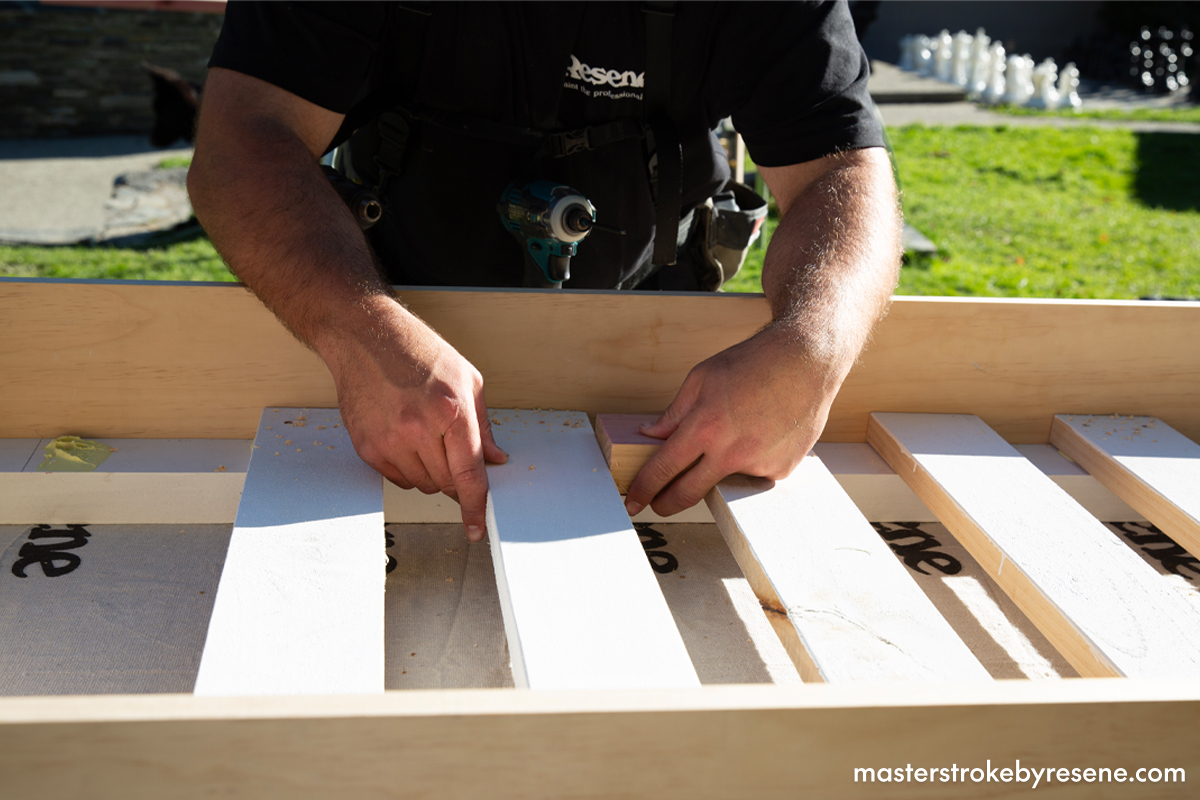
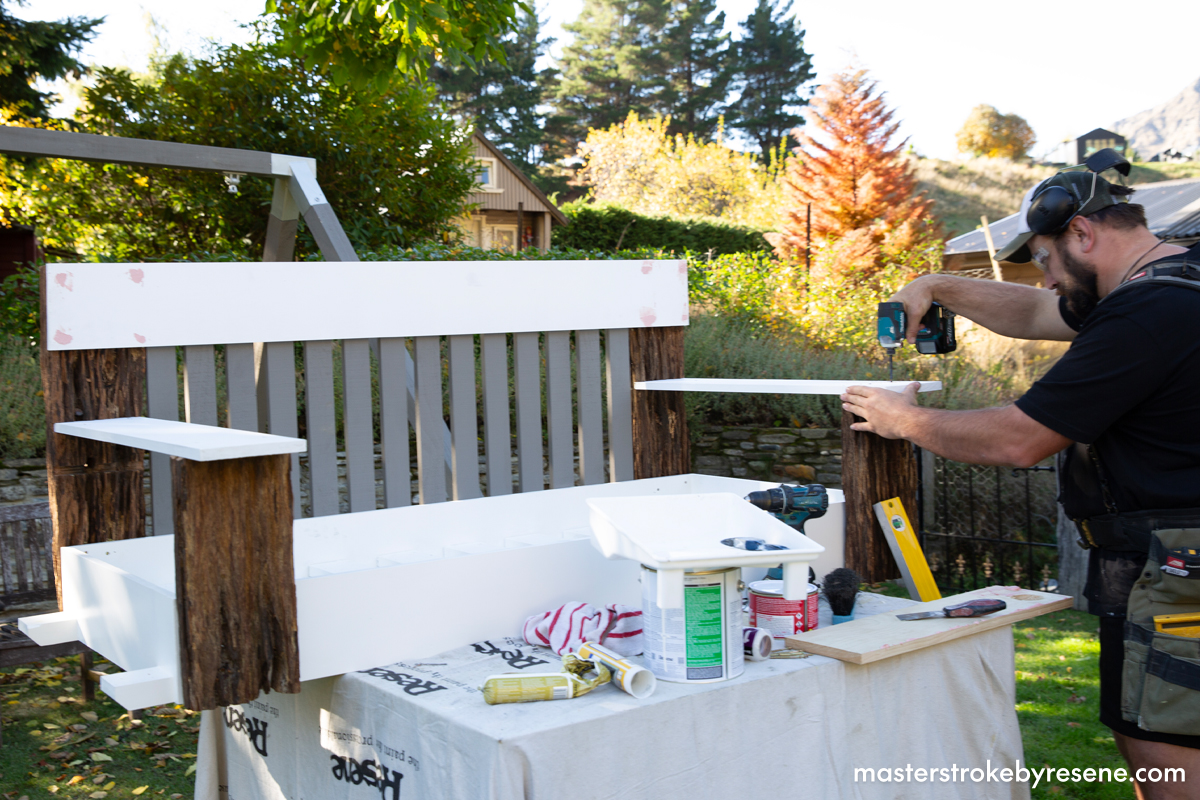
In this Odd Jobs video, Queenstown-based builder Josh Lysaght shares the step-by-step process on how to create your own bespoke swing chair.

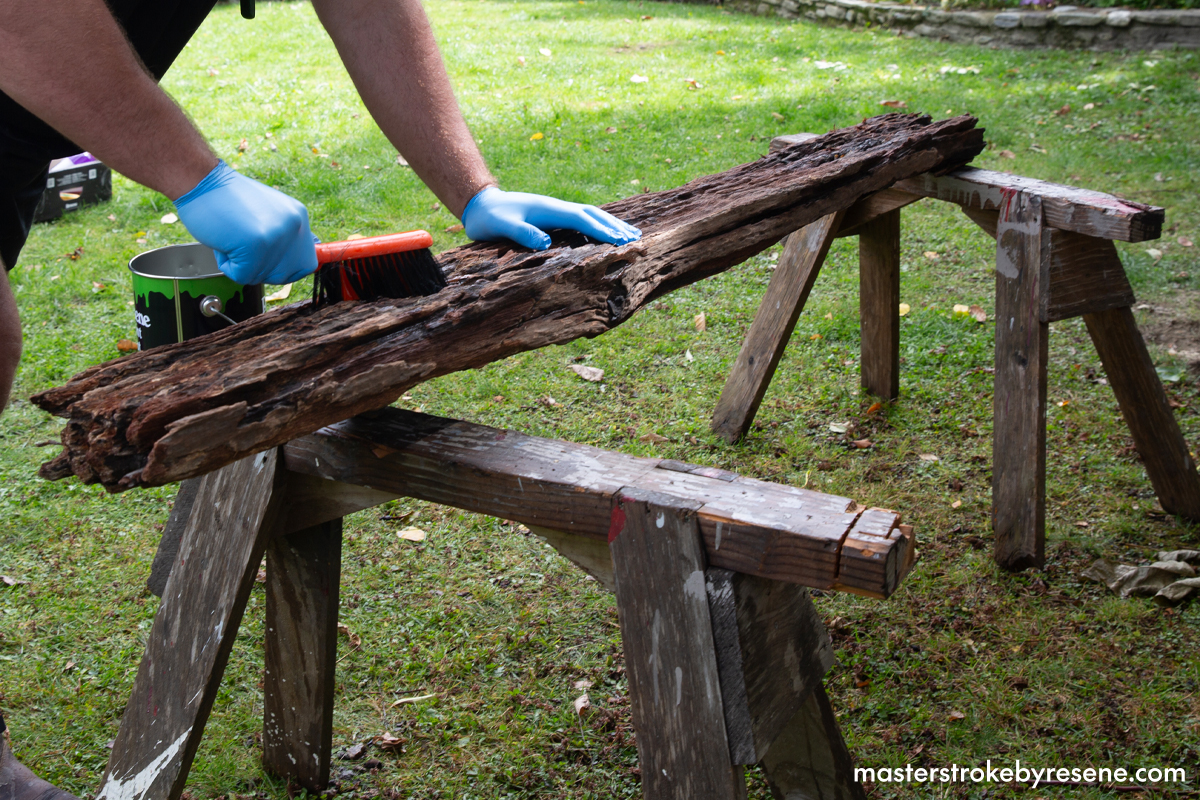
This is a statement outdoor furniture piece, with the practical, love seat-style chair suspended by chains from a sturdy A-frame. The use of railway sleepers takes it to the next level – these can be easily sourced from local demolition yard or Trade Me.

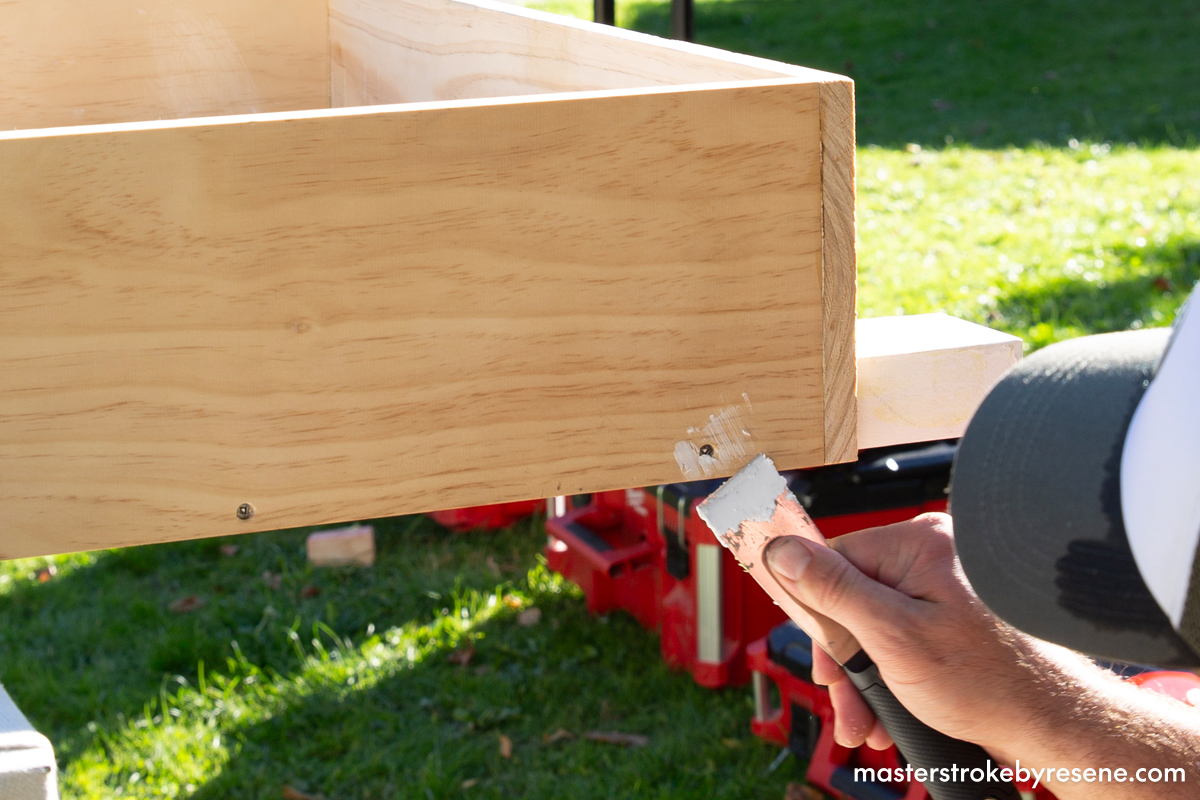
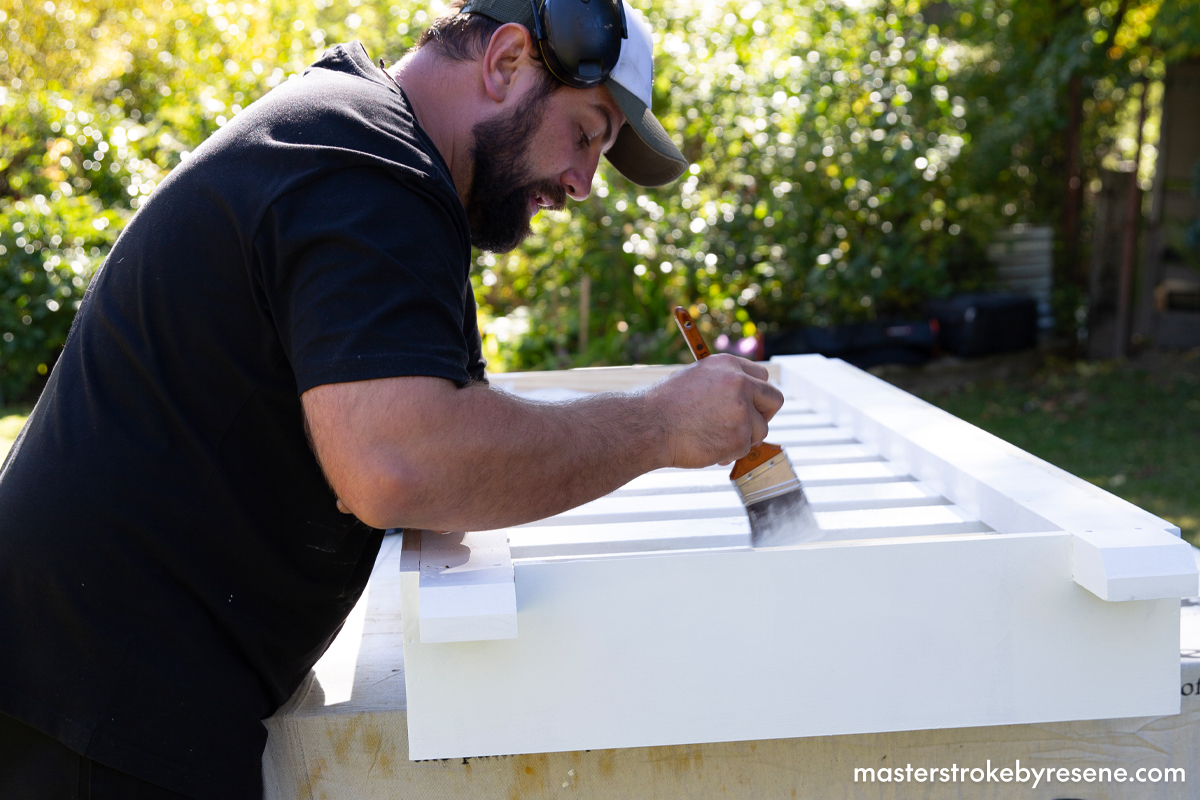
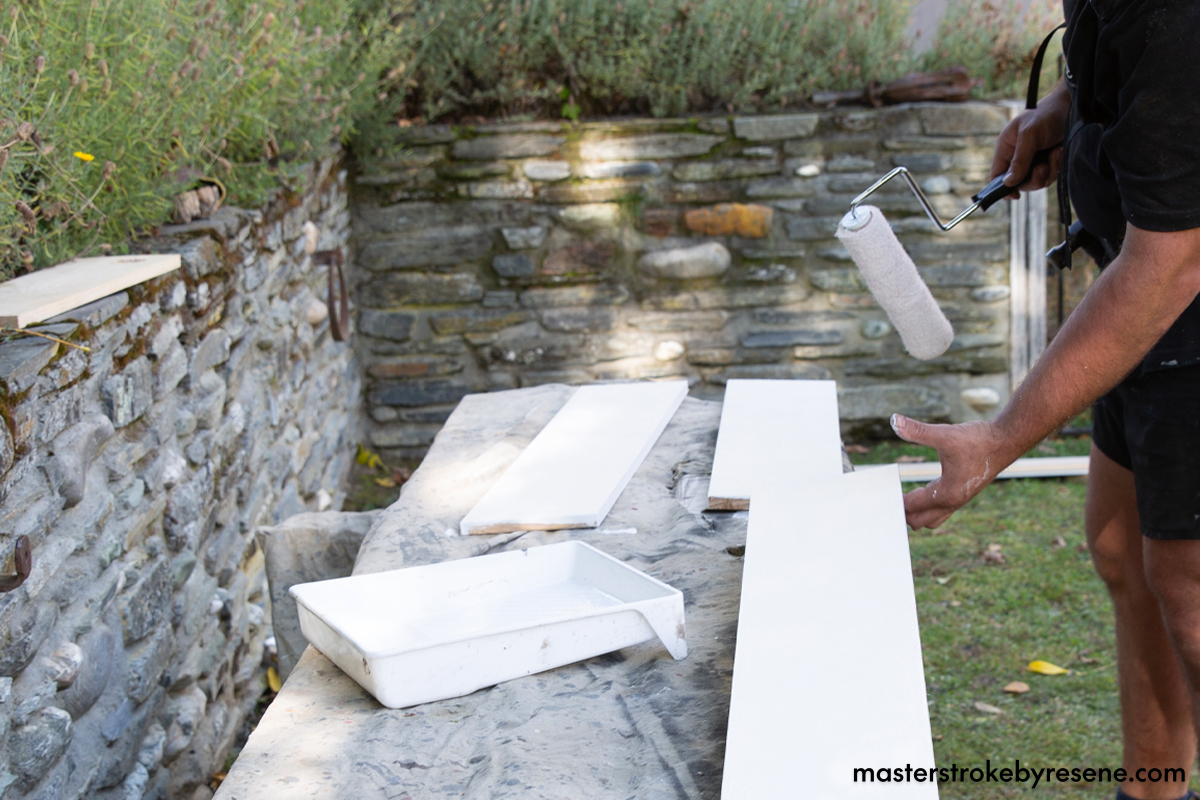
Swing chairs are a timeless addition to any backyard, and although you can paint yours any colour you like, Josh has used Resene Half Cararra for a soft, classic look. With this neutral base, you can change up the look seasonally and personalise it further by changing the cushions and throws.

This is a satisfying weekend DIY project that you and your family and friends can enjoy for years to come.

  • Frame: 4x 2450mm x 100mm x 100mm fence posts
                  1x 2400mm x 100mm x 100mm fence post
  • Railway sleepers: 2x 785mm x 170mm
                                    2x 430mm x 170mm
  • Base box: 2x 1750mm x 180mm x 18mm timber planks
                      2x 735mm x 180mm x 18mm timber planks
  • Base runners: 2x 1945mm x 90mm x 45mm framing timber
  • Seat slats: 10x 695mm x 100mm x 25mm timber planks
  • Arm rests: 2x 90mm x 185mm x 19mm timber planks
  • Back rest: 1735mm x 185mm x 18mm timber plank
  • Back slats: 14x 760mm x 70mm x 25mm timber planks
  • Resene EzyFill Quick
  • Resene paint stirrer
  • Resene paint pot
  • Paint can opener
  • Paintbrushes
  • Resene drop cloth
  • Paint roller and tray
  • PAL Speedbrush
  • Resene Waterborne Woodsman penetrating oil stain
  • Resene Quick Dry waterborne primer undercoat
  • Resene Lustacryl semi-gloss waterborne enamel
  • Resene Timber and Deck Wash
  • Resene Furniture and Decking Oil
  • Galvanised screws
  • Chain
  • Anchor hooks
  • Swivel brackets

  • Power drill
  • Impact driver
  • Hand saw
  • Circular saw
  • Orbital sander
  • Flexi tool
  • Hammer and nail

1

Prepare the railway sleepers

Put on rubber gloves to protect your hands and decant Resene Deck and Timber Wash into a Resene paint pot. Resene Timber and Deck Wash is a quick and easy way to clean surfaces prior to staining or painting. It not only provides an immediately cleaner base to the wood, but also helps maintain the longevity of the stain you’re going to use over the top. 

Use a scrubbing brush to wash each side of the sleepers thoroughly with quick, sweeping strokes. Rinse off with a hose and leave them to dry.

2

Make the base box

Measure and cut two 1750mm x 180mm x 18mm timber planks and two 735mm x 180mm x 18mm timber planks. These will form the four sides of the base box. 

Glue the ends of the baseboards and secure with screws or nails.

3

Prime the base runners

After giving the Resene Quick Dry a good mix with a paint stirrer, decant it into a roller tray. 

Use a roller to apply the primer to the two pieces of 1945mm x 90mm x 45mm framing timber and leave them to dry. 

Doing this step ensures the longevity of the painted timber and is ideal for use under Resene Lustacryl semi-gloss waterborne enamel.

4

Insert the runners

Turn the base box upside down and carefully mark and cut slots at both ends to fit the base runners. 

Using a circular saw to cut a bevel angle at the end of each runner will give a tidy and professional-looking finish. Next, apply glue to the slots and tap each runner in, then screw along the length of the base box to secure.

5

Tidy up the base box

Use a flexi tool and Resene EzyFill Quick to fill all the holes, then sand them down to create a seamless finish. 

Wipe away the sanding dust with a clean, dry cloth.

6

Make and insert the bed slats

Measure and cut the timber planks with a circular saw to create a total of 10 slats that measure 695mm x 100mm x 25mm. These will sit on top of the runners to form the base of the seat. 

Sand each slat with an orbital sander and sandpaper to create a smooth finish. Wipe off all sanding dust. 

Decant more Resene Quick Dry into a tray and prime the slats with a roller and wait for them to dry. 

Once dry, place the slats into the base and cut and use a small spacer block to make sure they’re evenly spread. Once you’re satisfied with the placement of the slats, glue and screw to secure.

7

Finish priming and paint

Using a paintbrush, apply Resene Quick Dry to all the areas that haven’t been primed yet. 

Once it’s all dry, decant Resene Lustacryl into a clean roller tray and use a roller to apply two coats to the entire structure, allowing dry time in between coats.

Top tip: Josh used Resene Half Cararra to paint his swing chair, which gives the chair a crisp, Hamptons-style look. If you prefer something darker and more edgy, or a deeper shade that will pop against a tropical or native garden, try a shade like Resene All Black. If you’re choosing a dark colour, consider using the CoolColour version of the colour to reflect more heat and keep your chair cooler than the standard colour.

8

Make the backrest and armrests

Measure, cut and paint the 1735mm x 185mm x 18mm timber plank, which will become the backrest that sits along the top of the chair, as well as the two 90mm x 185mm x 19mm timber armrest planks.

9

Build the A-frame

Prep the top of each fence post so that it will slot into the metal brackets. Arris the corners and then smooth down the length of each post. 

Decant Resene Waterborne Woodsman into a clean tray and then apply it with a PAL Speedbrush – this ensures fast, clean and effective application. Josh has used Resene Smokey Ash to complement the Half Cararra of the base, backrest and arms. 

Install the posts into the brackets and secure with galvanised screws. Stand the frame upright, then measure and install the swivel brackets – this is where the hooks and chains will be anchored from.

10

Attach sleepers

Measure and cut the railway sleepers into two 785mm x 170mm and two 430mm x 170mm pieces. 

Apply Resene Furniture and Decking Oil to the railway sleepers – this is a transparent resin-and-wax blend that brings out the beauty of timber. The easy-to-apply formula is a bit like using interior furniture polish, and it helps to protect outdoor furniture from UV damage and mould.

Screw or nail the two shorter pieces into either corner at the front of the base box, and the taller two at the rear. Then screw or nail in the backrest plank along the top.

11

Complete the chair

Cut 14 backrest slats measuring 760mm x 70mm x 25mm. 

Stain them with two coats of Resene Waterborne Woodsman using a speedbrush allowing dry time between coats

Install them vertically across the back of the seat by marking them up and then carefully and screwing them in at the top and bottom.  

Secure the arm rests with screws.

12

Suspend the chair

Install the anchor hooks to the four outer edges of the base runners, then loop the chains through the hooks and swivel brackets at the top of the frame.

13

Hang out!

Place outdoor cushions into the base and voila! You’re ready to take a load off and enjoy your brand-new swing chair.

About MasterStroke by Resene
MasterStroke by Resene is here to help you master your paint and decorating DIY projects. Brush up on your skills with advice, tips and ideas from our trusted experts.

Check out the latest how-to videos on our YouTube channel.