DIY projects

Make a console table using old drawers

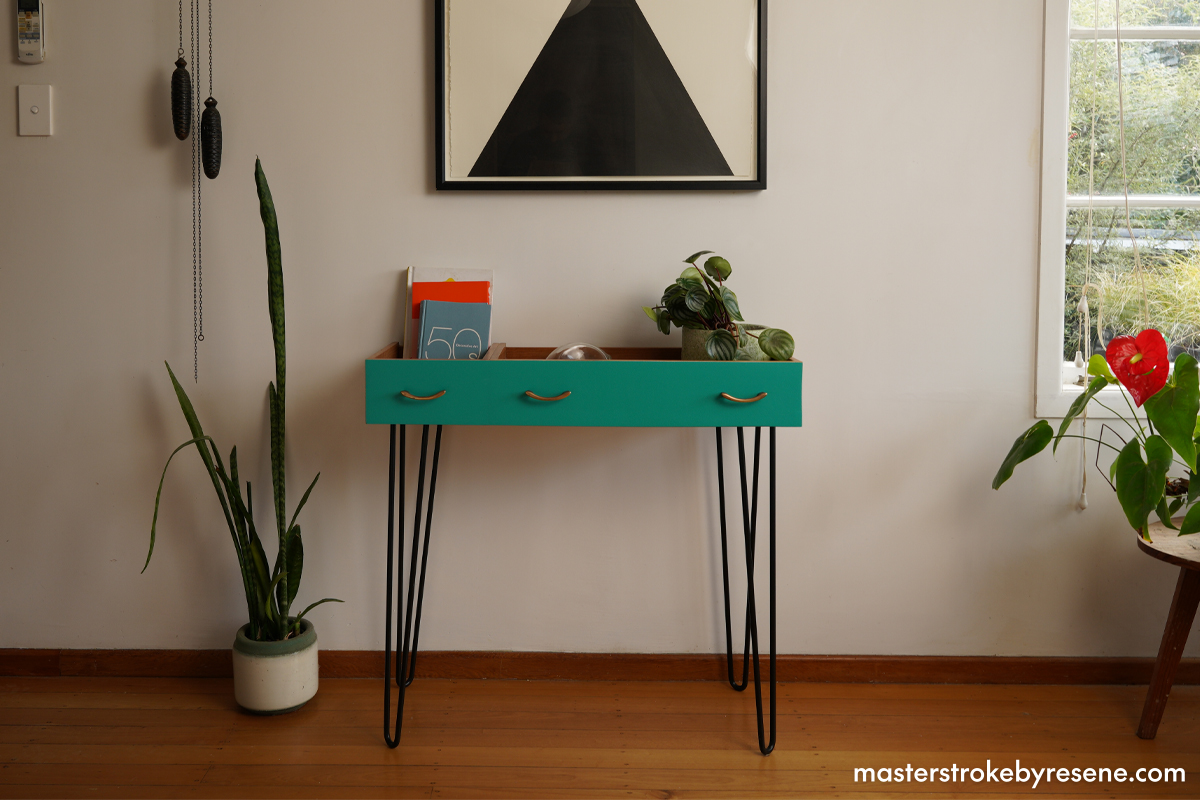
The Upcycler, aka Jacob Leaf (Ngāpuhi), has done it again – he’s created a bespoke console table out of some old drawers that have definitely seen better days. Console tables are a fun and stylish way to display your favourite vases, plants, photo frames and coffee table books, without the need for a large shelving unit. They add a retro touch of character to any room, and the world is your oyster when it comes to selecting a Resene colour or colours to paint them with. 

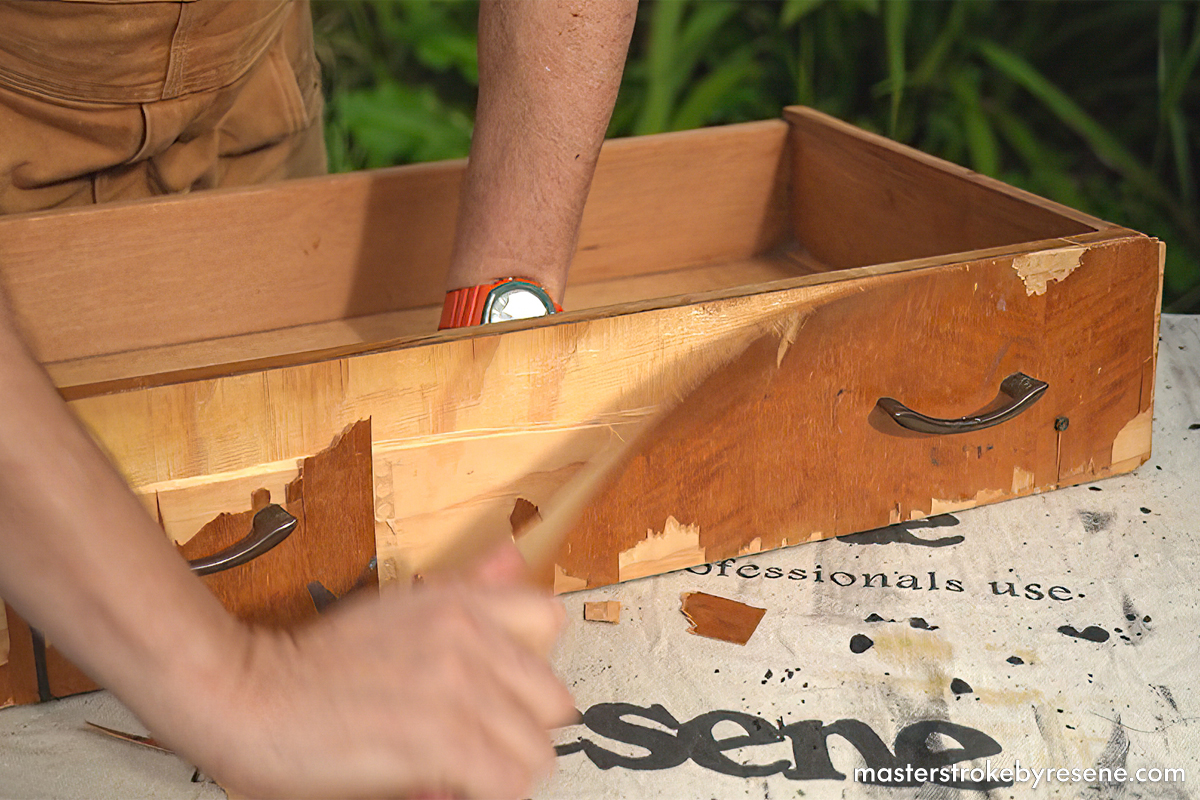
Wooden chests of drawers are a clunky furniture item that most of us have in our possession, often being carted from home to home as you move over the years. Instead of buying a new console table, breathing new life into these drawers by repurposing them will save you money, reduce landfill and allow your creativity to shine through. Jacob has used two drawers for his console table, a larger one and a smaller one from the same set, which creates a handy partition within the table.  

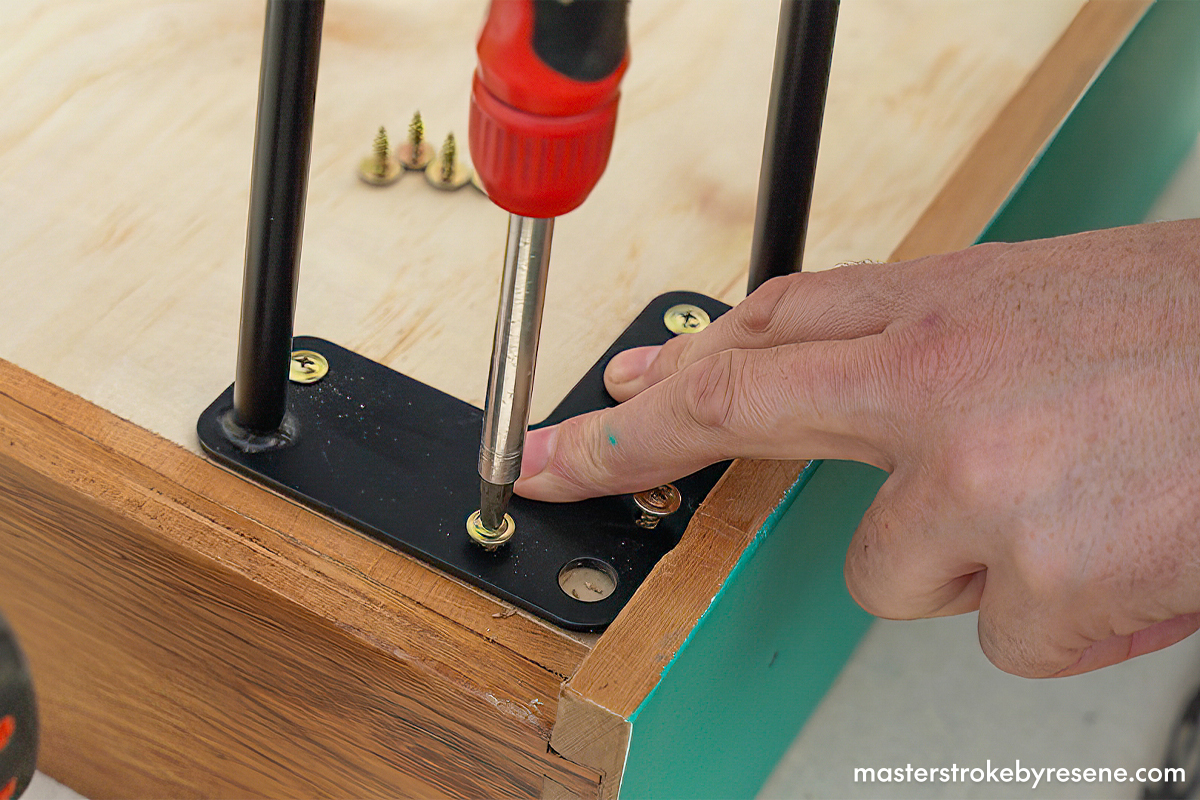
Follow Jacob’s easy step-by-step guide to create your very own upcycled furniture piece.

1

Prepare the drawers

Place a drop cloth on the area you are working on to protect it from damage or spills as you work. 

Remove the handles and any damaged or broken veneer, then use a sander on all surfaces, including every corner of the base and all edges. Don’t forget to wear your safety glasses, mask and ear protection when you do this step. Wipe away all sanding dust.

2

Join the drawers

Going the extra mile to make this as sturdy as possible means that it will have the strength to hold a wider variety of items. First glue the two drawers together using PVA, then secure with speed clamps and screw together with a 3mm wood drill. 

Turn the base over and measure out two pieces of scrap 10mm plywood to fit each section, then glue on with PVA. Doing this step will further strengthen the base enough to accommodate a good selection of display pieces.

3

Varnish

Letting the natural beauty of the wood shine through in some areas adds a vintage touch to the table.

Use painter’s tape to mask the front of the drawers, then brush on three coats of Resene Aquaclear waterborne urethane varnish into the inside of the drawers, along the top edges and the outer sides for a professional looking finish. This is the perfect product for furniture, as it’s designed to enhance and protect timber. Be sure to allow dry time between each coat, to give each a chance to dry properly.

4

Prime time

Once your varnished areas are dry, mask them with painter’s tape. This will keep all the edges nice and crisp. 

Using a Resene #1 Smooth Surface Easy Reach 100mm roller kit is ideal for a job like this. Simply decant Resene Quick Dry primer into the tray and use the roller to apply it in short, smooth strokes to the front panel. 

Pouring it into the tray first means that you’ll keep the primer still in the tin free of any dirt or fibres that may be on your brushes or rollers so it will keep better for another project.

5

Add some colour

Carefully open the lid of your Resene SpaceCote Low Sheen can with a screwdriver or a Resene paint can opener. While this may seem like an unimportant step, opening the can incorrectly may cause damage – it could affect the lid going back on properly and not creating a good seal, which in turn can spoil the paint. 

Stir the paint with a Resene paint stirrer and decant into your tray. Use the roller to apply the paint in the same short, smooth strokes. Jacob is using the colour Resene Deep Sea. Be sure to allow dry time between coats before you apply your second coat and remove the masking tape. 

For a higher sheen finish, use Resene Lustacryl semi-gloss waterborne enamel or Resene Enamacryl gloss enamel.  The higher the sheen level the brighter your colour will look.  For a more toned back style, use Karen Walker Chalk Colour paint from Resene ColorShops instead – it’s a matt finish that will give your furniture a more aged look.

6

Add legs and handles

While you could choose any legs you like – there are plenty of options to choose from – these steel hairpin ones work beautifully on this console table. You may even be able to use legs from an old piece of furniture you already have.

Flip the drawer upside down and secure the legs to the base, nestling the brackets snugly into each of the four corners and screwing them in tightly. 

Turn the table upright and reattach the handles. 

Top tip: To add an extra touch of flair and decoration, you can attach any type of knobs or handles that you wish. Depending on your home’s aesthetic and existing furniture, you could opt for crystal, brass or even vintage-inspired novelty ones.

7

Fill with your favourite items

Now all you need to do is find the perfect place for it in your home and pile it high with your favourite things!

Top tip

If you prefer to keep your timber finishes natural, use Resene Colorwood interior wood stain to enhance the timber colour, while still allowing the beauty of the timber grain to show through.  Then finish with Resene Aquaclear varnish.

About MasterStroke by Resene
MasterStroke by Resene is here to help you master your paint and decorating DIY projects. Brush up on your skills with advice, tips and ideas from our trusted experts.

Check out the latest how-to videos on our YouTube channel.