DIY projects

Make your own concrete pet food station

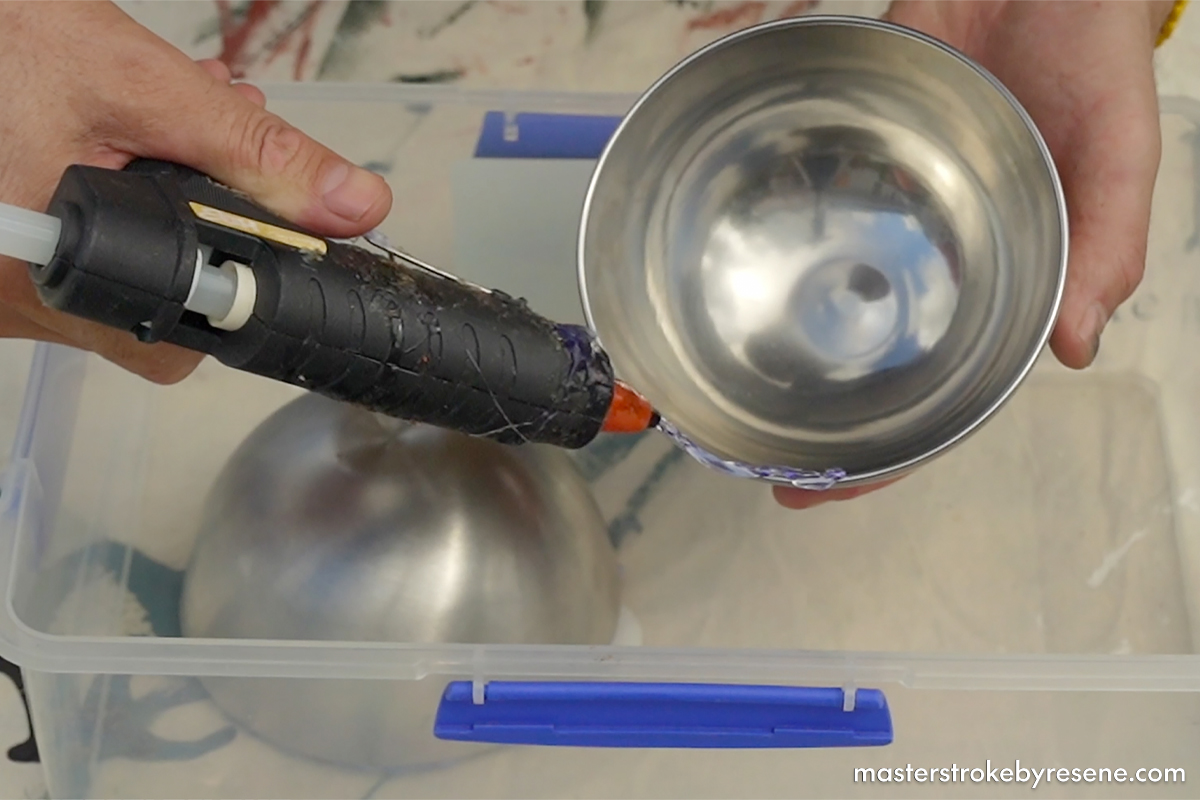
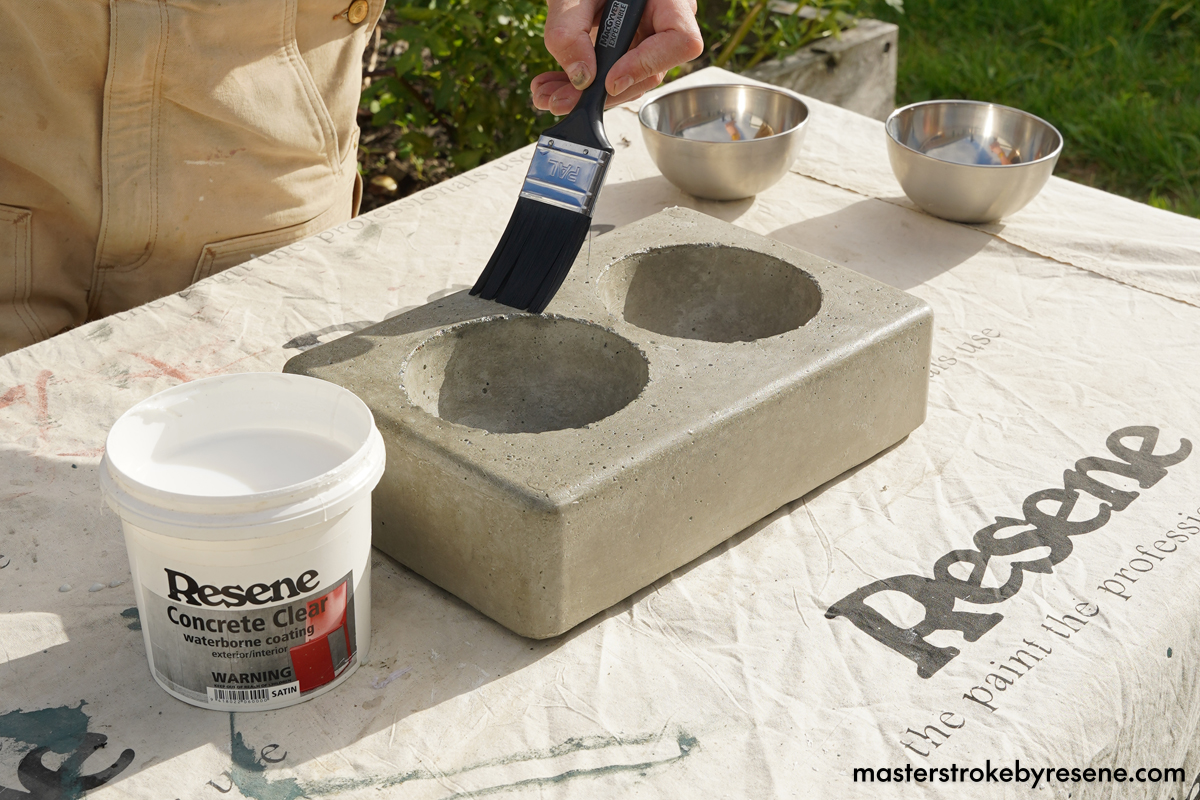
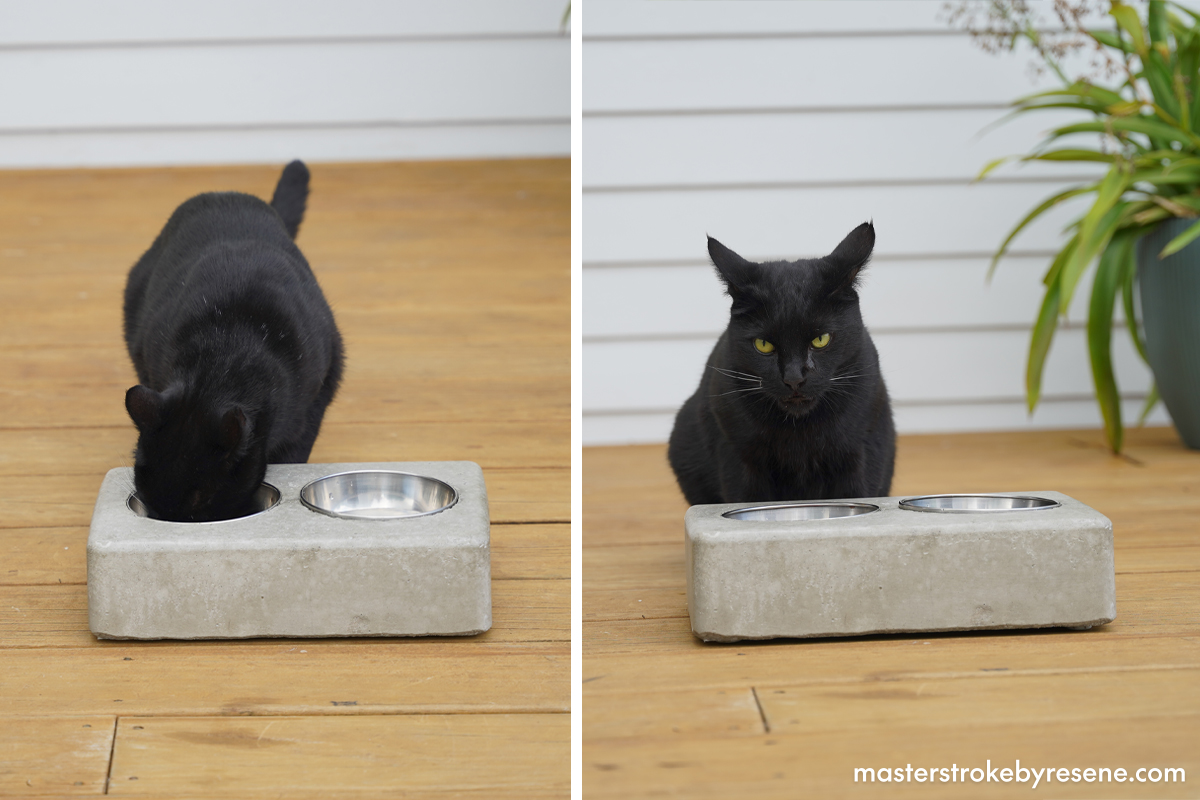
Forget boring plastic bowls – make the stylish food station your pet deserves with this fun DIY project. This piece features two stainless steel bowls that sit in a concrete base sealed with Resene Concrete Clear for a professional looking, durable finish.  

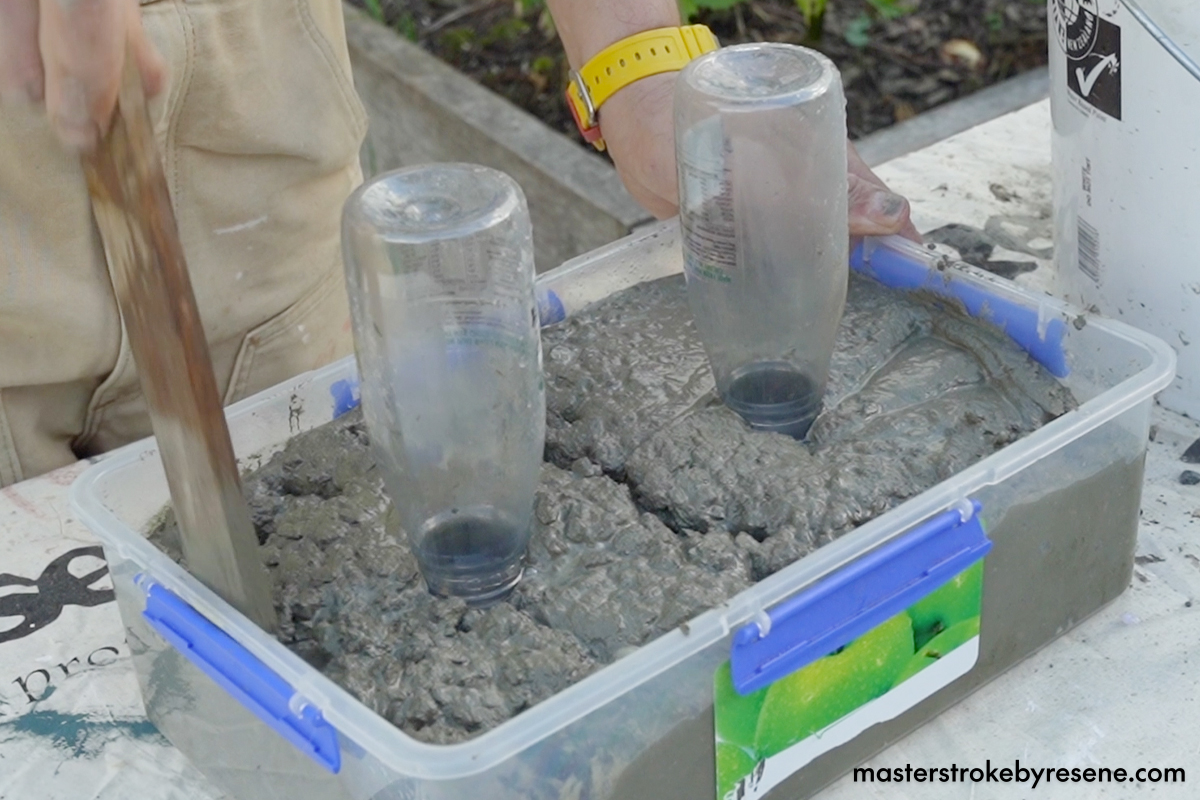
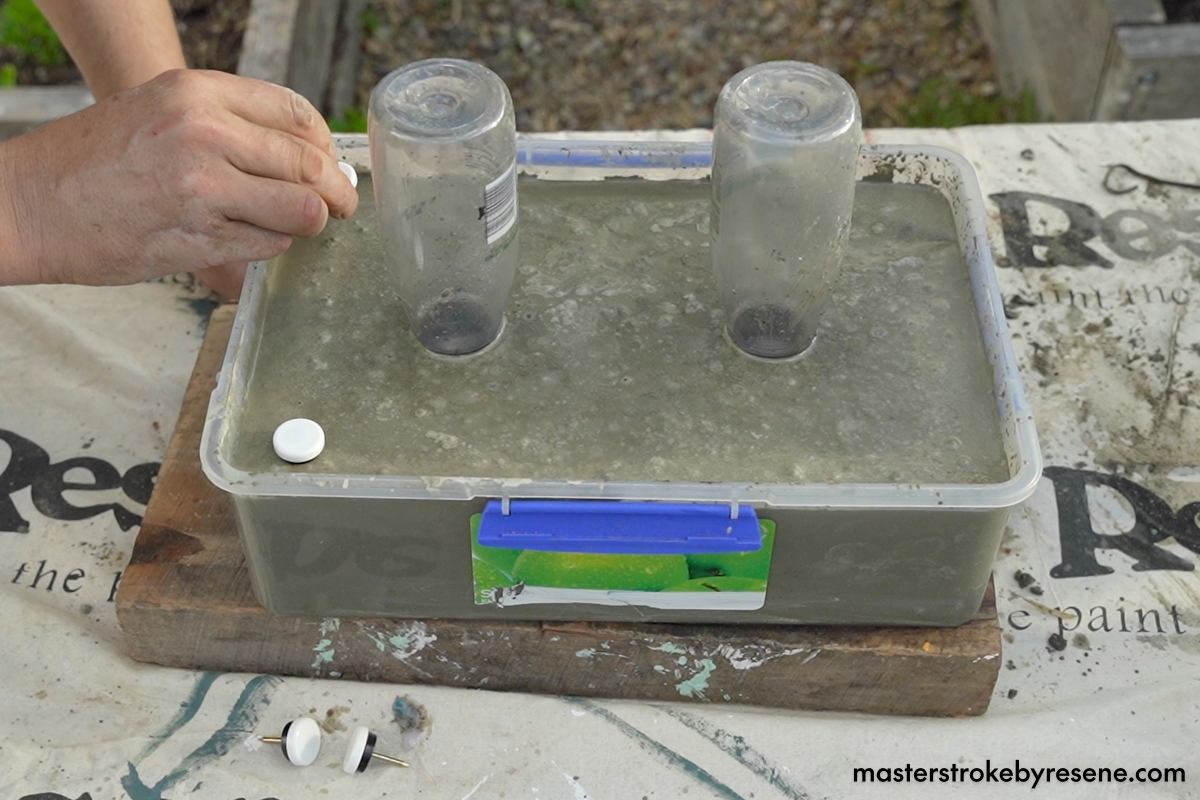
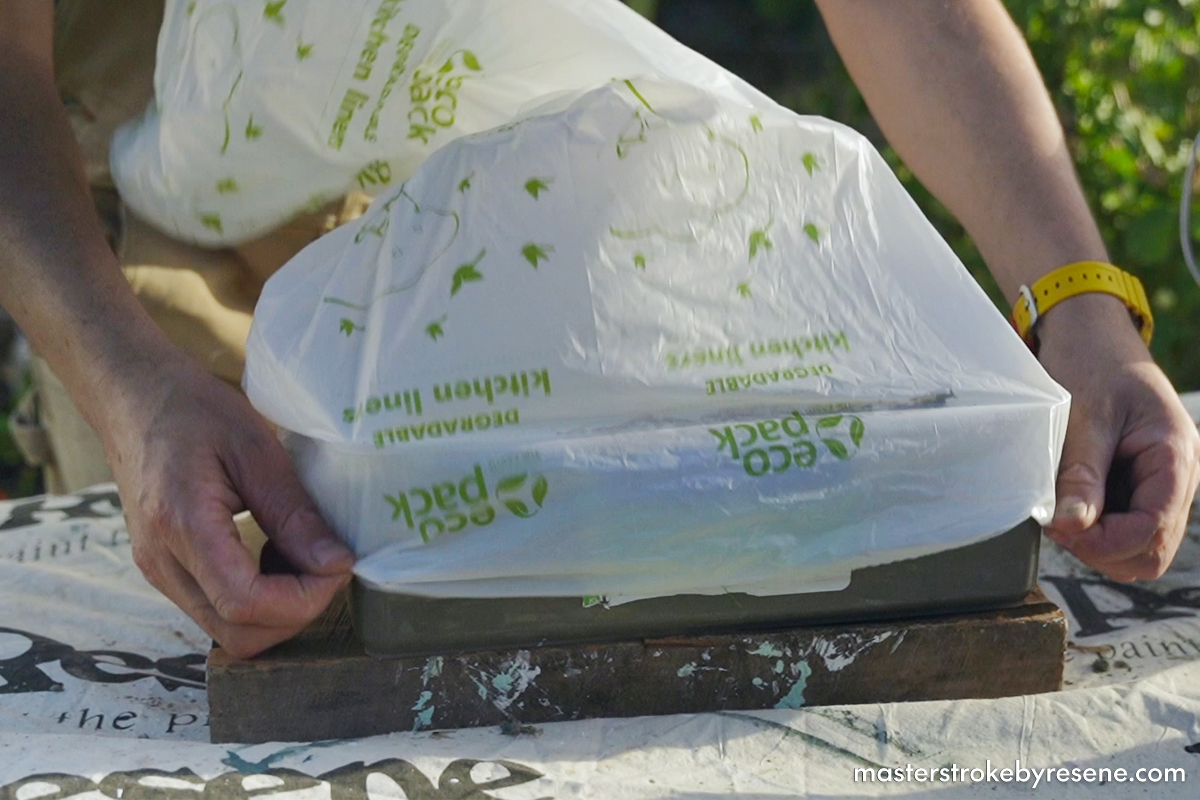
The process is relatively straightforward and suits all confidence levels. This is a great project to get the kids involved with, as they can practise their paintbrush skills by sealing the concrete. Make sure you allow the concrete enough time to cure before coating it. 

Follow along with The Upcycler, aka Jacob Leaf (Ngāpuhi), to create your very own pet feeding station.

  • 2 small stainless steel bowls
  • Old plastic container (large enough to fit two small bowls)
  • 2 small plastic bottles
  • Olive oil
  • Half a bag of quick-to-set concrete
  • 4 rubber furniture pads
  • Reusable plastic bag
  • Resene Concrete Clear waterborne coating. Available in flat, satin and gloss. The gloss finish is the easiest to clean. We recommend using satin or gloss for this project. We used satin.

  • Hot glue gun and glue sticks
  • 1 old 10L Resene paint bucket (for mixing concrete)
  • Concrete trowel
  • MacGyver all purpose paintbrush
  • Hand sander
  • Angle grinder
  • Safety gear

1

Make the mould

Apply hot glue to the rim of both stainless steel bowls then fix them to the inside of the plastic container.

2

Add old bottles

Apply hot glue to the rim of both plastic bottles then glue these to the upturned stainless steel bowls.

3

Coat with oil

Brush a thin layer of olive oil over the inside of the mould – this will make it easier to remove once the concrete has set.

4

Fill the mould

Mix concrete following the instructions then fill the mould. Use a hand sander to vibrate the concrete into place.

5

Smooth the surface

Smooth the surface off with a concrete trowel then insert the furniture pads.

6

Leave to set

Cover with a plastic bag then put it in a cool place to cure – the plastic bag will stop the concrete from drying too fast and help prevent cracking. 

Leave to cure for at least three days.

7

Remove the mould

Remove the concrete from the mould then cut down the plastic bottles. Remove the stainless steel bowls from the concrete by pushing them through from the underside.

Clean any glue residue from the bowls then smooth any rough edges off the concrete with a file or angle grinder and give it a good dust. Make sure you wear a dust mask when you are filing or grinding off edges.

8

Seal the deal

Seal the concrete with two coats of Resene Concrete Clear waterborne coating for a professional look and for easier cleaning.

9

Dinner is served!

This bespoke bowl is sure to cement you as your pet’s favourite human.

Deck stained in Resene Woodsman Wood Oil Stain in Resene Natural and weatherboards painted in Resene Quarter Silver Chalice.

Tips for painting around pets

  • Pets can be tough on furnishings and surfaces, with all those paws and claws taking their toll. It’s a good idea to use hard-wearing waterborne enamel products such as Resene SpaceCote Low Sheen for walls, as a slightly higher sheen finish is more likely to repel fur and dirt and can be wiped down easily. 
  • Animals have a heightened sense of smell, so if your pet is sensitive, consider using Resene Zylone Sheen Zero, a paint from the Sensitive Choice-approved range with very low odour and no added VOCs (volatile organic compounds). 
  • For a more durable finish in pet washing spaces, especially for active pets that may be damp when they come in from outside, look to Resene SpaceCote Low Sheen Kitchen & Bathroom and Resene Lustacryl Kitchen & Bathroom, which come with the added benefit of anti-bacterial silver and MoulDefender additive.
  • If you have pets that scratch the door when they want to come inside, paint the door with Resene Enamacryl or Resene Super Gloss, which are harder for claws to penetrate. 
  • When undertaking paint or DIY projects at home, it’s a good idea to give your pets a little holiday, either with a friend or at a kennel or cattery. This lets you focus on getting the DIY done and avoids curious pets leaving unexpected paint paw prints.
  • Paint flooring with Resene Walk-on – it’s tough and can endure knocks, scrapes and frequent cleaning – and finish with Resene Concrete Wax.

About MasterStroke by Resene
MasterStroke by Resene is here to help you master your paint and decorating DIY projects. Brush up on your skills with advice, tips and ideas from our trusted experts.

Check out the latest how-to videos on our YouTube channel.