DIY projects

How to build a bench seat using old Resene buckets

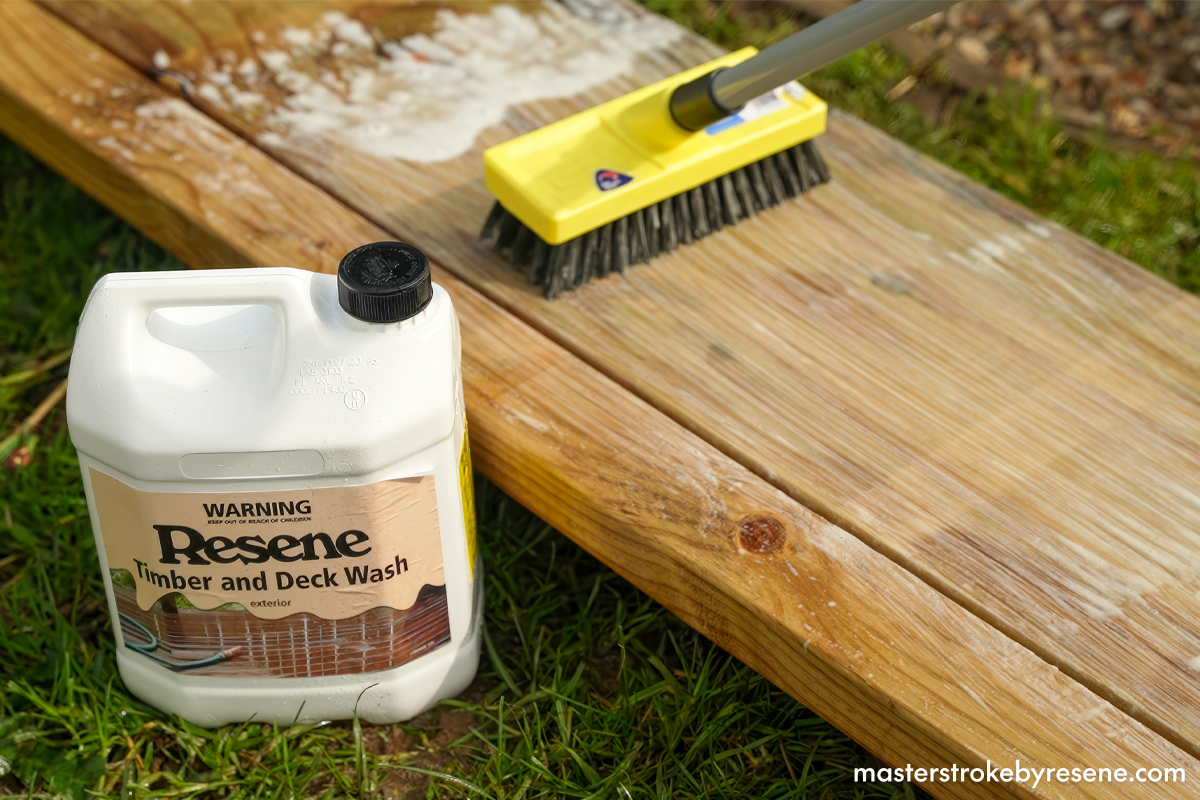
Spring is a great time to get outside and give the exterior of your home a bit of a spruce up, especially your decks. These will more than likely be displaying all the moss and mould that likes to rear its head over winter. 

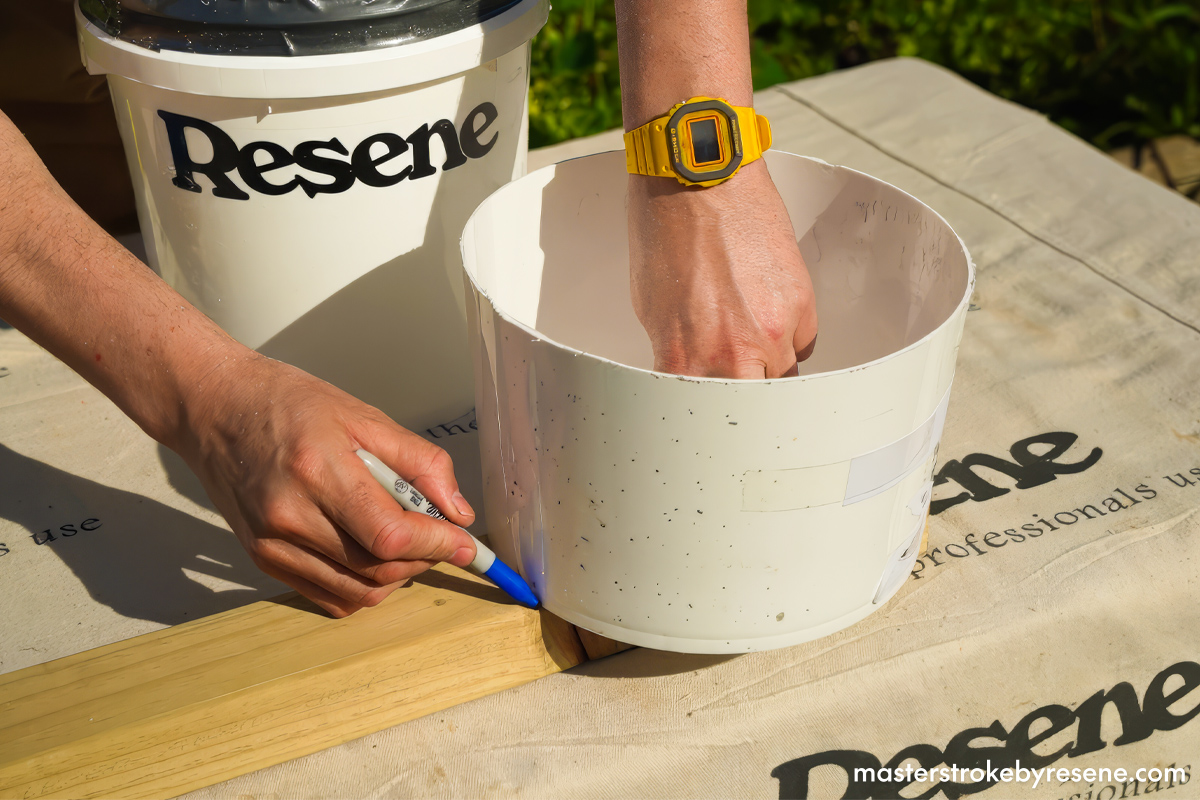
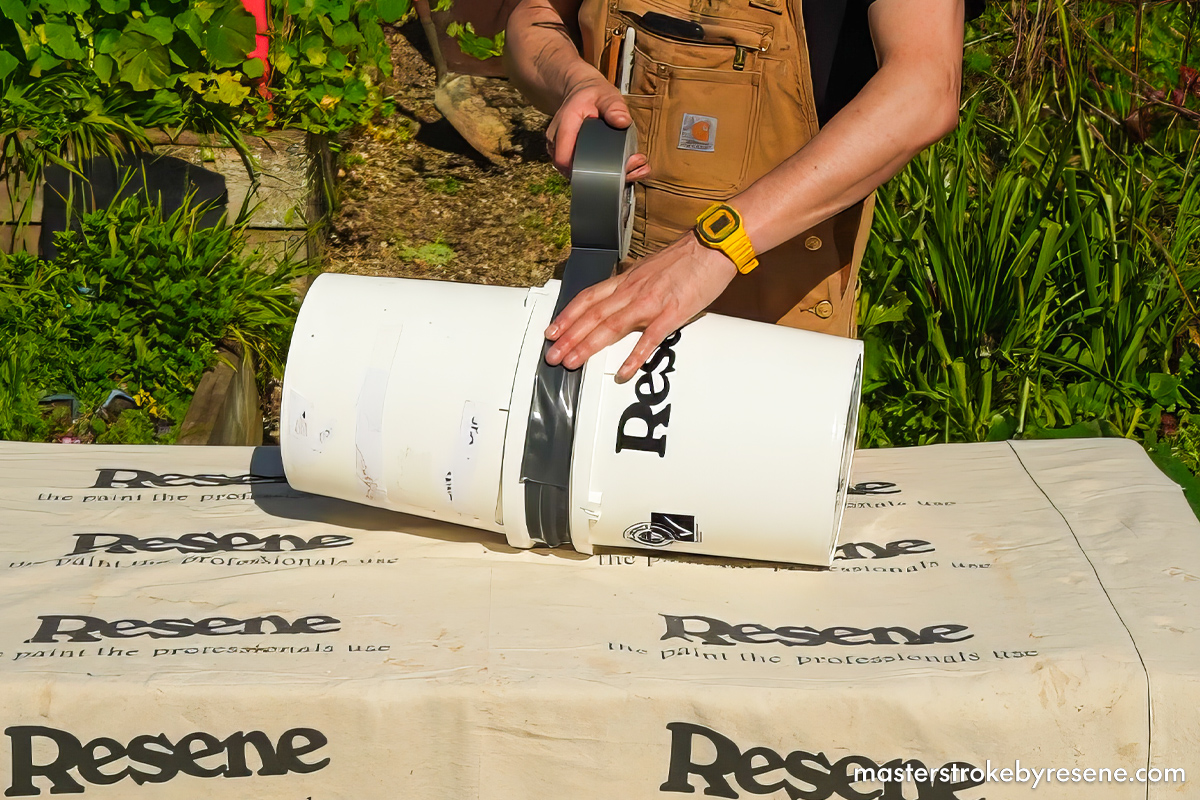
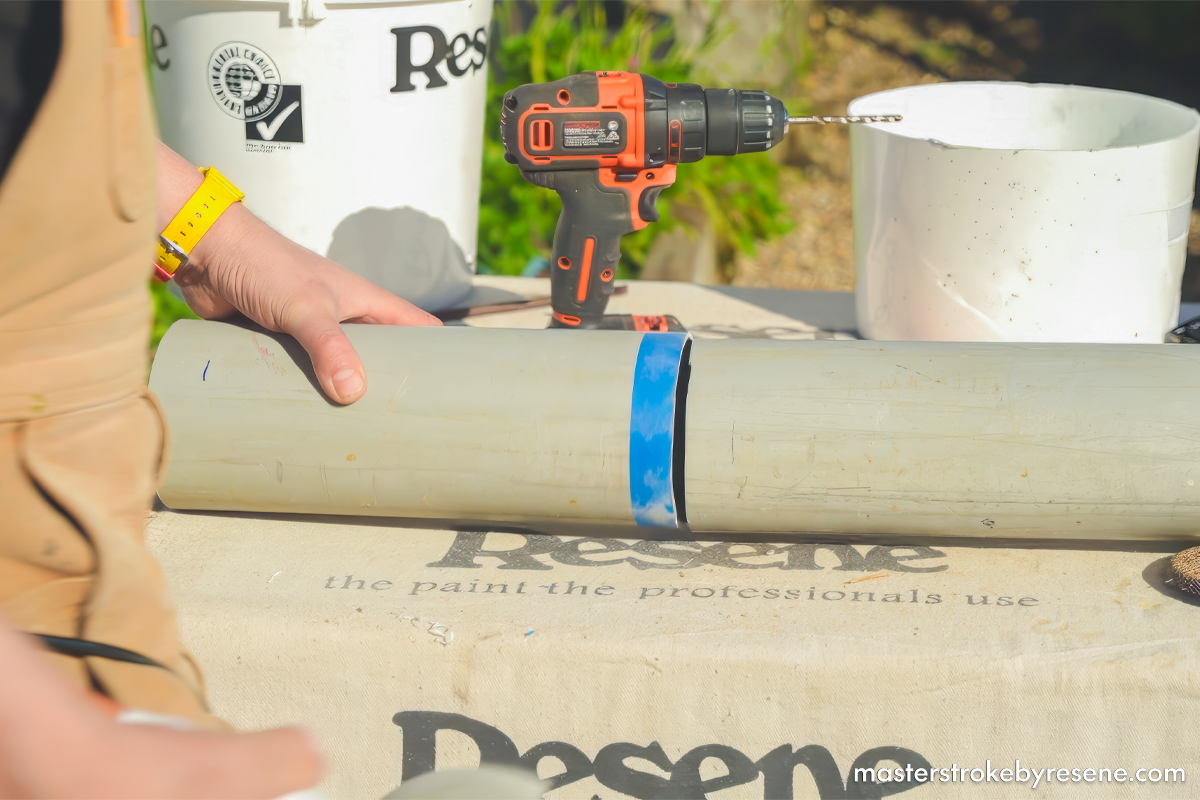
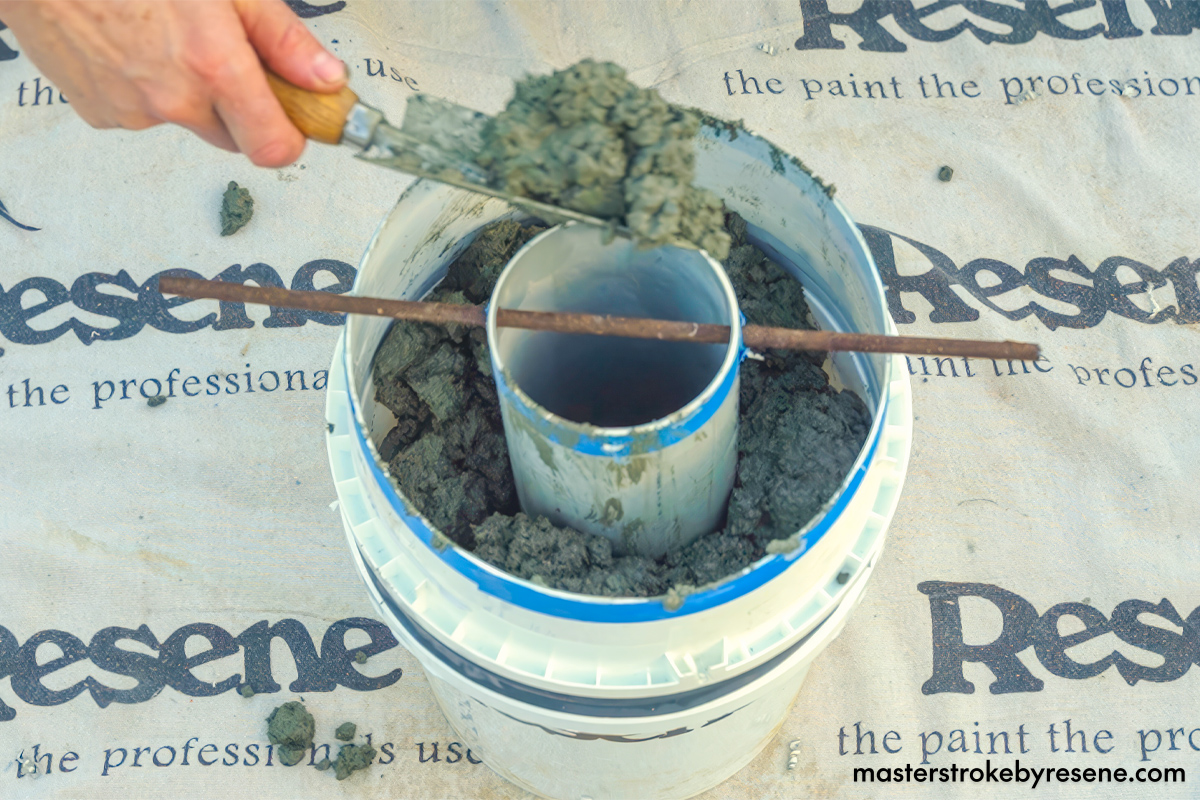
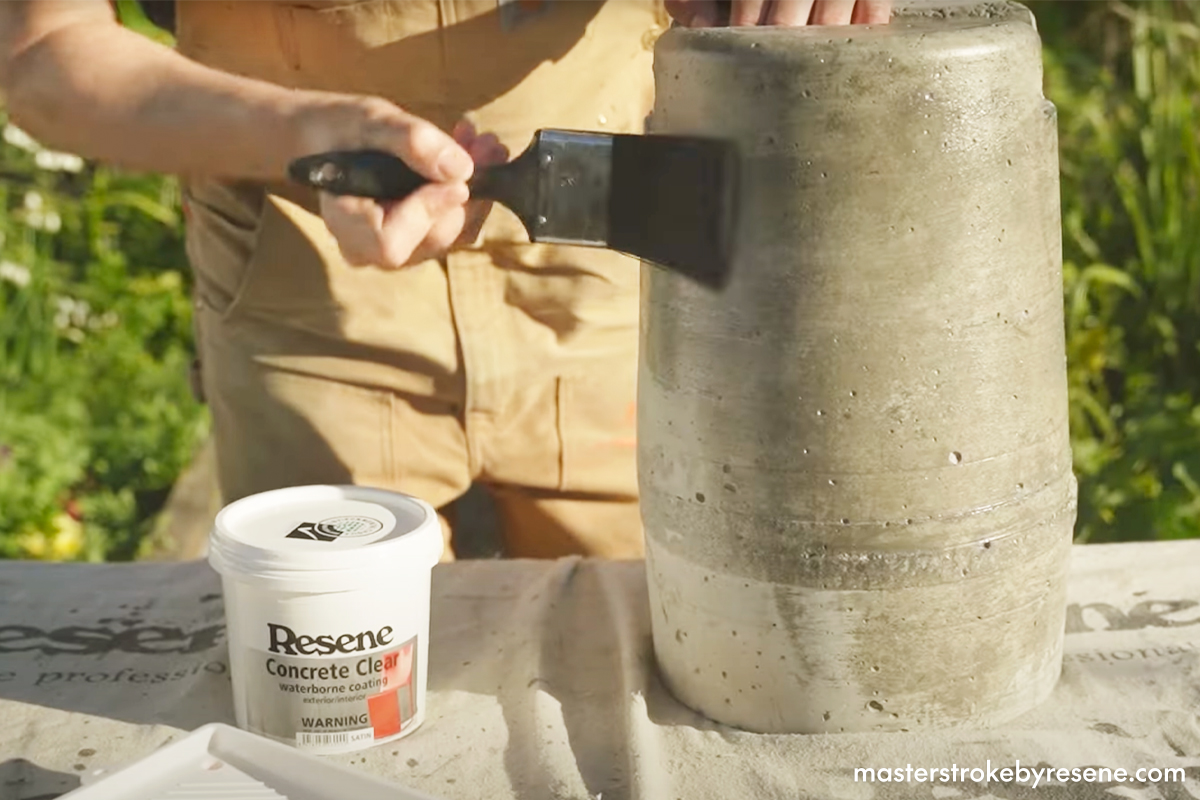
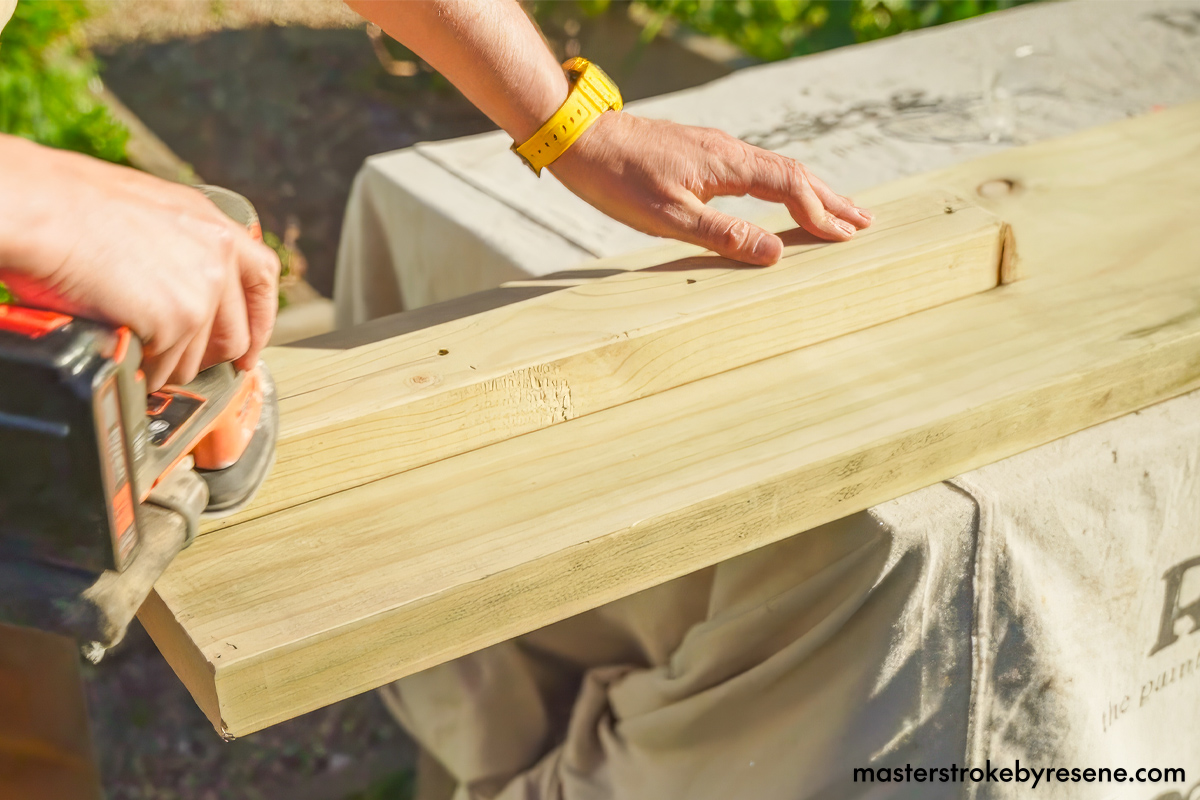
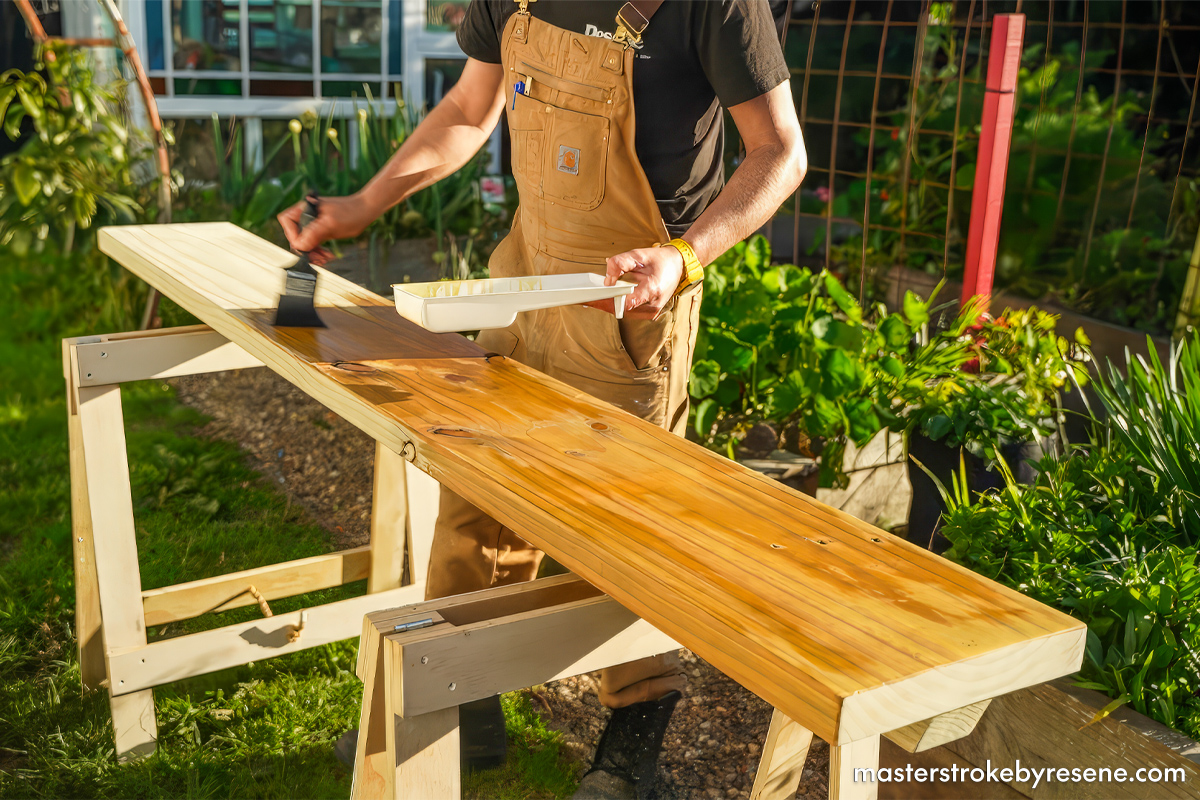
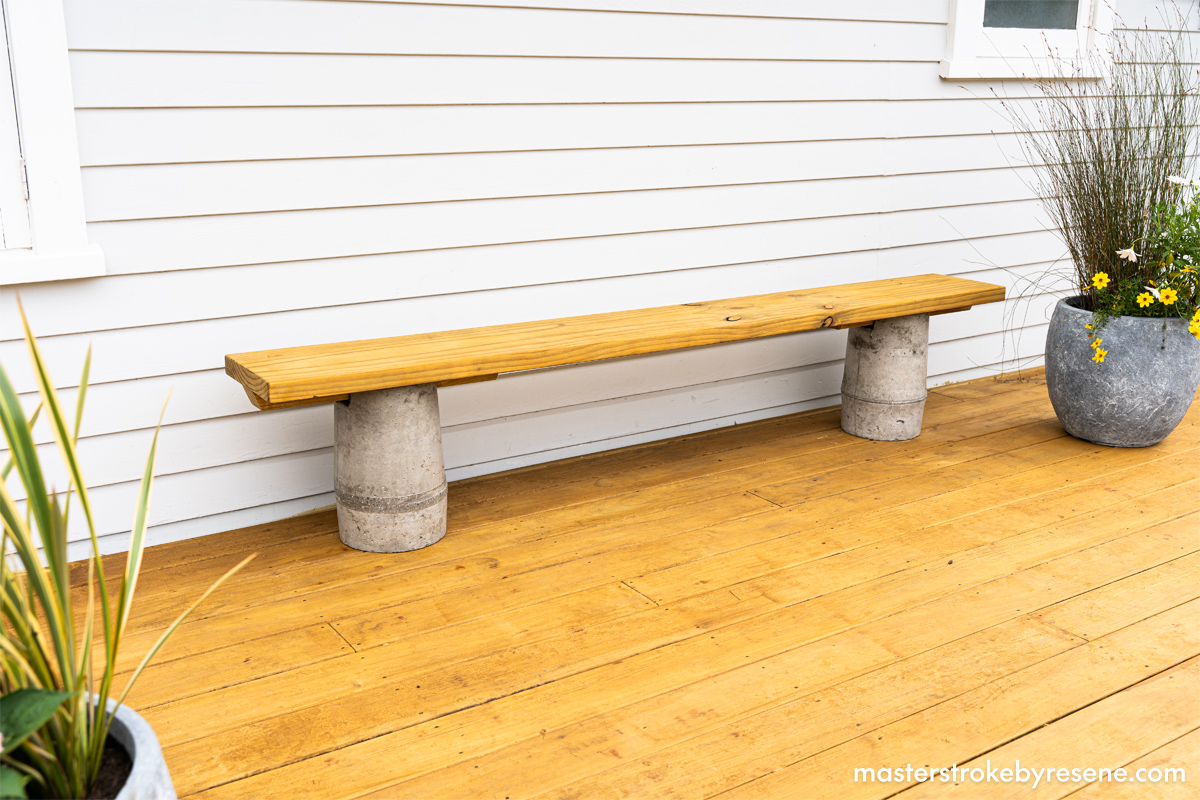
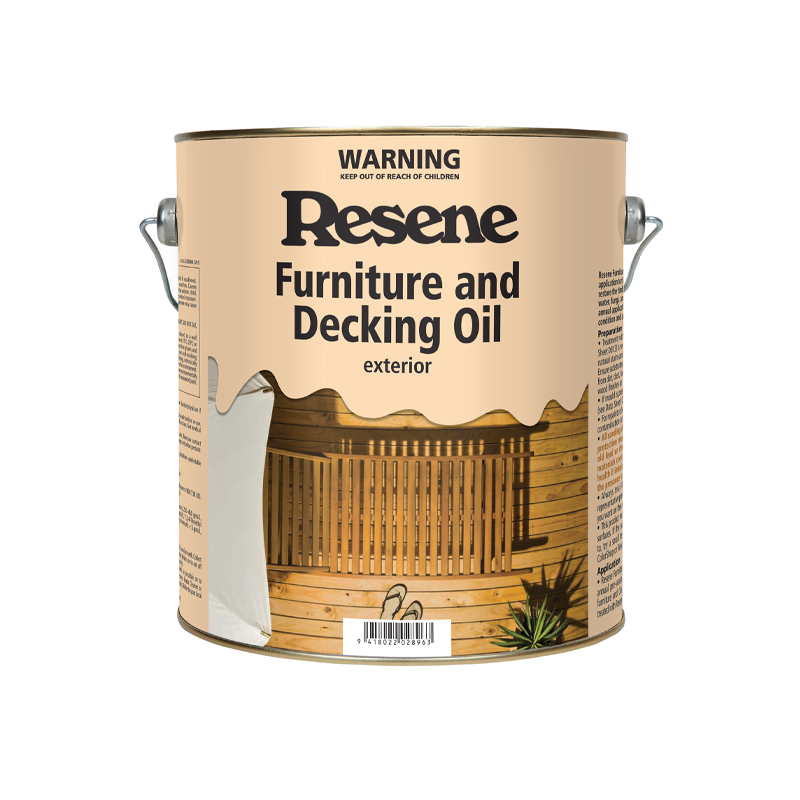
Once you’ve attacked this, why don’t you flex your creative muscles and build a bespoke piece of outdoor furniture to display on it? In this episode of The Upcycler, Jacob Leaf (Ngāpuhi) shows us how to make a super cool bench seat using old 10-litre Resene plastic paint buckets. Jacob used the buckets as moulds to make two concrete bases which he sealed with Resene Concrete Clear waterborne coating, then used a piece of timber finished with Resene Furniture and Decking Oil as the bench. These products give it a very professional looking finish and the stylish, simple form means that it’ll work with almost any outdoor setting. 

Jacob takes you through this easy to follow, step by step project.

  • Garden sprayer
  • Deck brush
  • Pencil
  • Tape measure
  • Snips
  • Wheelbarrow
  • Shovel
  • Concrete trowel
  • Hammer
  • Angle grinder with cut-off disc and grinding disc
  • Drop saw or handsaw
  • Sander
  • Drill
  • 4mm wood drill
  • Square driver bit
  • MacGyver all purpose paintbrush

1

Wash the timber

Begin by clearing space in your garden and using Resene Timber and Deck Wash to give both pieces of radiata pine a good wash.

Follow the instruction on the back of the pack for best results and use a garden sprayer to apply the product before giving them a good scrub with a deck brush. Finally, rinse thoroughly with the hose.

2

Make the notch

Take one of your old Resene paint buckets and trace the bottom of it onto both ends of the smaller piece of timber to make a notch for the mould. Then trim it down with a drop saw or handsaw and sand it into a rounded shape. Wipe off the sanding dust.

Wrap the piece of notch timber in bubble wrap then cover it in duct tape. This will make the mould a little wider than the notch timber and easier to remove from the concrete you’ll pour in.

3

Start the moulds

Tape two used paint buckets tightly together with duct tape, then measure and mark the buckets to a height of 400mm. Mask the line with painter’s tape, then trim it off with the cut-off disk. Place the wrapped notch timber at the bottom of the bucket and secure it in place on both side with screws.

Repeat with the other two buckets so you have two moulds.

4

Trim the pipe

Cut a 250mm-long piece of the PVC pipe – this will be placed in the centre of the concrete mould. Doing this will create a cavity in the mould and reduce the weight, which will make it much easier to manoeuvre.

5

Mix and pour the concrete

Mix the concrete according to packet instructions then start filling the mould. When the notch timber is covered by about 50mm of concrete mix, place the PVC pipe in the middle, then keep filling around the pipe.

When the mould is full, smooth the surface off, then cover with a plastic bag to stop the concrete from drying too quickly and cracking. Leave it to cure for at least three days – longer if you can.

6

Reveal and seal the concrete

Unscrew the notches on either side of the buckets and remove the buckets, using a hand saw to cut away if you need to. Then trim the PVC pipe and remove the notch timber – this should come out relatively easily.

Clean up any rough edges using a hammer and angle grinder, then seal the concrete with Resene Concrete Clear waterborne coating. This is a tough waterborne glaze for use on concrete and brick surfaces. It enhances the colour and natural beauty of concrete, brick and stone and provides a clear protective layer that can be much more easily cleaned than the bare surface. It comes in flat, satin and gloss so you can choose a sheen level to suit – the gloss finish is the easiest to clean.

7

Make the seat

Mark out and trim any rough ends off the larger piece of timber.

Cut two 600mm notch pieces with chamfered edges from the remaining smaller piece of timber. Centre them to the underside of the seat timber at each end and screw in place.

Sand the seat timber down, and wipe off the sanding dust.

8

Stain the seat

Apply Resene Furniture and Decking Oil using a paintbrush.

Just as the bark of a tree protects the timber beneath, you need to make sure wooden furniture is well protected to keep it looking good and minimise permanent damage to the surface. We all know that the sun is harsh on skin, and it is just as harsh on exterior timber surfaces.

9

All done

You did it! Go on, take a seat, you deserve it.

Top tip:

For a darker stained finish, use Resene Woodsman in place of Resene Furniture and Decking Oil.  Or if your timber hasn’t cleaned up that nicely, you could paint it instead with Resene Lumbersider Low Sheen or Resene Lustacryl semi-gloss waterborne enamel.

About MasterStroke by Resene
MasterStroke by Resene is here to help you master your paint and decorating DIY projects. Brush up on your skills with advice, tips and ideas from our trusted experts.

Check out the latest how-to videos on our YouTube channel.